REVIEW · LAKE TAHOE
Sunset Hike and Photography Adventure in South Lake Tahoe
Book on Viator →Operated by Tahoe Outdoor Adventures · Bookable on Viator
Sunset hikes are great. This one adds coaching and a climb. You’ll hike out toward jaw-dropping viewpoints where Lake Tahoe looks different from the trail, then you get real-time photo help for taking shots of the lake and you—with your phone doing most of the work at golden hour.
Two things I really like about this experience: the small group (maximum 15) and the fact that the guide is actively helping with photos, not just leading the walk. Expect a more personal vibe, plus guide-led angles and tips that make it easier to get “wow” shots without being a professional.
One thing to consider: this is not an easy stroll. You’ll need moderate fitness, and the route can include steep climbs, off-trail sections, and high-elevation effort—so go in with realistic expectations (and pace yourself).
In This Review
- Key highlights worth your attention
- Golden hour views over Lake Tahoe, with photo coaching
- Small-group hiking (max 15) means you actually get time
- What $125 really covers in a Tahoe sunset hike
- Getting ready: moderate fitness, steep spots, and the right gear
- Stop 1: Lake Tahoe California viewpoints and first-photo positioning
- Stop 2: Lake Tahoe area scenic moments for your own shots
- Stop 3: Nevada-side boulders, steep effort, and 360-degree sunset views
- What it feels like during the 2-hour climb
- Gear and extras: poles, boots, and simple summit snacks
- Who should book this sunset photo hike
- Should you book Tahoe Outdoor Adventures for a sunset photo hike?
- FAQ
- How long is the sunset hike?
- How many people are in the group?
- Is this hike suitable for beginners?
- What photography help do I get?
- What’s included, and can I get hiking boots?
- Do I need to bring snacks?
- What happens if the weather is bad?
Key highlights worth your attention
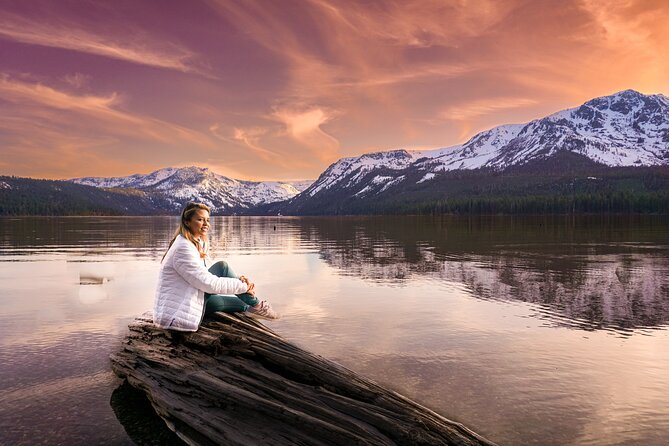
- Photo help built into the hike: the guide takes photos of you and gives you tips for your own shots
- Golden hour viewpoints: plan for romantic 360-degree views and dramatic sunset light
- Three vantage zones: you’ll shift between Lake Tahoe California, the broader Tahoe area, and viewpoints toward Lake Tahoe Nevada
- Guides who manage the details: previous guests mention guides like Martin, Nick, Michelle, and photo-taking from angles that work for social posts
- Gear support on arrival: hiking poles included, and rental hiking boots may be available if you ask ahead
- You’re back where you started: the tour ends back at the South Lake Tahoe meeting point
Golden hour views over Lake Tahoe, with photo coaching
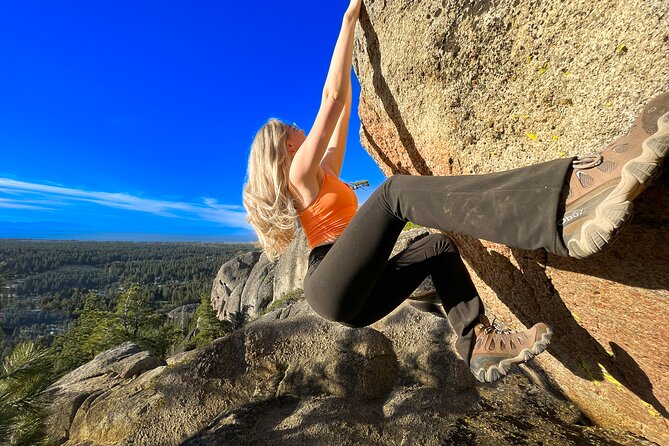
If your Tahoe memories are mostly from the highway pull-offs, this hike changes the story. You’ll earn the views with your legs, then spend that best light of day at viewpoints that feel like they’re for postcards but still personal.
What makes this outing stand out is the pairing of movement and photography. You’re not just walking to a viewpoint and hoping for a good shot. The guide stays engaged—taking photos of your group or couple while also helping you find better camera angles for your own phone. Even if you’re not a “photo person,” the structure makes it easier to get images that look intentionally composed instead of random screenshots.
The vibe is also built for real life. People do this for couples photos, family shots, and even milestones like engagements and elopements. You’ll see that in how the hike is paced and how often you pause to get the right moment.
And because the group is small, you’re less likely to feel rushed or ignored. You can ask questions, adjust your pace, and get help where you need it.
You can also read our reviews of more tours and experiences in Lake Tahoe.
Small-group hiking (max 15) means you actually get time
Size matters on hikes. In large groups, you often become a spectator to your own experience—following along, trying to keep up, and hoping the guide notices you need a photo at the best moment.
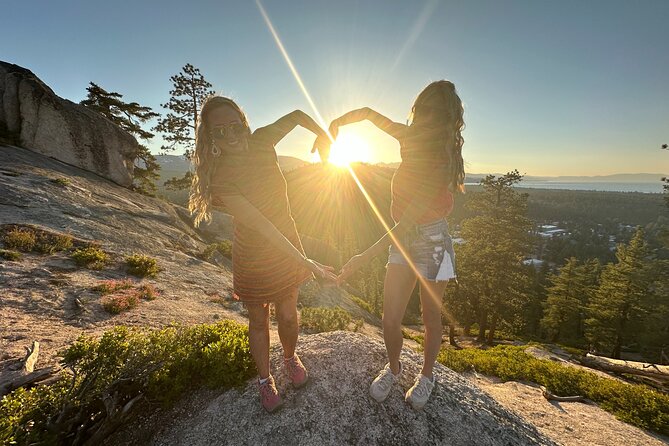
Here, the maximum of 15 travelers changes things. You get a more personal guide presence, and you’re not stuck waiting your turn for every photo stop. Guests who’ve been on the hike highlighted that guides were friendly and accommodating, and that they took plenty of pictures while also giving guidance on how to shoot better (including iPhone tips in one case). That’s the difference between being taken along and being helped.
Guides named in past experiences include Martin and Nick, with Michelle also mentioned often. One review even points out Michelle’s carefully angled photos that look great on social media posts. Another guide detail: Roxie the dog shows up on the hike with at least some groups, and yes, she can be quite the trail presence.
If you want a hike where you feel like the guide is working the whole time—photos, timing, and comfort—this format is a good fit.
What $125 really covers in a Tahoe sunset hike
$125 sounds like a splurge until you break down what you’re getting. You’re paying for more than someone leading you to a view.
Here’s what your money is buying:
- Guided sunset timing: golden hour is short, and getting your position matters.
- Photo service and coaching: the tour includes adventure photos plus on-the-spot tips for your own shots.
- Included hiking poles: small detail, but helpful when you’re dealing with uneven ground on the way up.
- Small-group experience: max 15 means you’re paying for personal attention, not just transportation.
- Fees and taxes included: there’s less surprise at checkout.
- Optional rental boots: you can reach out about rental hiking boots if you need them.
Then there’s the practical side. The tour is about 2 hours (approx.), so you’re not giving up half a day. And because the meeting and ending point is South Lake Tahoe, you can plan your evening without complex logistics.
Is it still a premium price? Yes. But for a guided sunset hike that also solves the hardest part—getting great photos of yourself and the view—this is a reasonable value, especially if you’re traveling with a partner, family, or planning a special event.
Getting ready: moderate fitness, steep spots, and the right gear
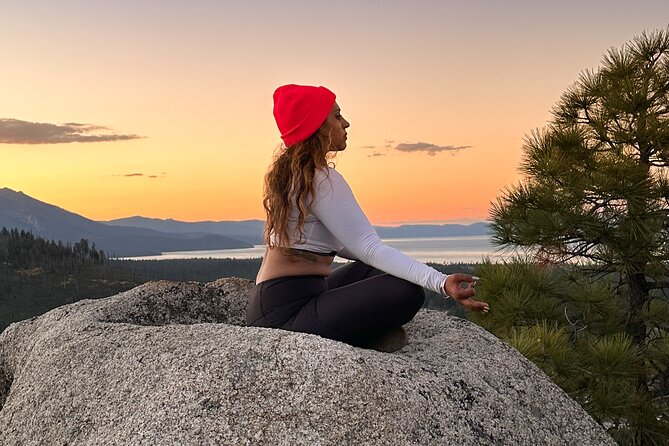
This isn’t marketed as a beginner hike. The route calls for moderate physical fitness, and the trip can include climbing to steep elevations. You should also expect that you might be moving through areas that feel more rugged than a paved trail.
A few other practical notes:
- There’s mention of off-trail hiking and steep inclines, so bring the mindset of a hike that asks for effort, not a casual walk.
- It’s not recommended if you have low fitness level sensitivity to high elevation. Tahoe sits high, and even if you’ve handled hikes before, this one pushes the pace at times.
- Service animals are allowed.
- There’s easy parking at various locations, and the tour is near public transportation.
On the gear side, you get hiking poles included. There’s also the option of rental hiking boots—reach out to ask, since availability and details aren’t spelled out here.
If you’re the type who usually shows up in sneakers, consider whether you’ll be comfortable on rough ground and during a sunset climb. You don’t need mountaineering boots, but you do need stable footwear. If you can borrow or rent boots, it can make the difference between enjoying the hike and spending energy worrying about your footing.
Stop 1: Lake Tahoe California viewpoints and first-photo positioning
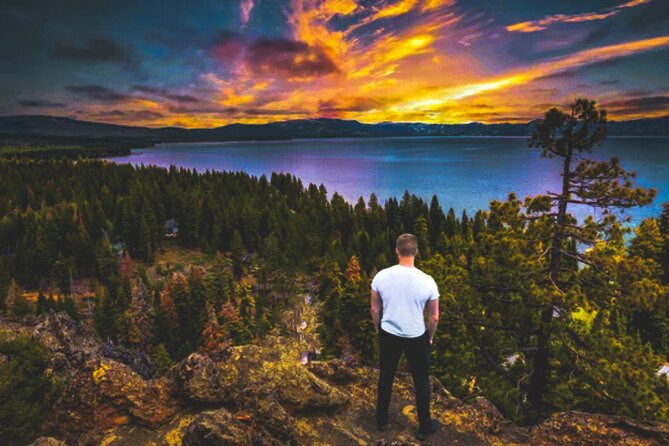
Your first viewpoint is framed as Lake Tahoe (California), and that matters because it sets the tone for the whole evening. Early in the hike, you’re building momentum and learning where the best light and angles will be later.
This is the phase where the guide helps you get started right:
- You’ll get coaching on where to stand for photos facing the water and where to place yourself so you don’t block the horizon.
- The guide is also taking photos of you while you’re moving, which helps if you’re thinking, I want to be in the pictures but I don’t want to spend the whole time posing.
The value of this first stop is momentum. You start with views that orient you—then later you’ll get deeper into the “wow” factors as the sun drops and contrast increases.
One more thing I’d plan for: the first stretch can set your pace for the entire hike. If you go out too fast, you’ll feel it later when the climb demands more effort. I like hikes where the guide controls timing, and here the experience is designed around sunset light and photo windows.
Stop 2: Lake Tahoe area scenic moments for your own shots
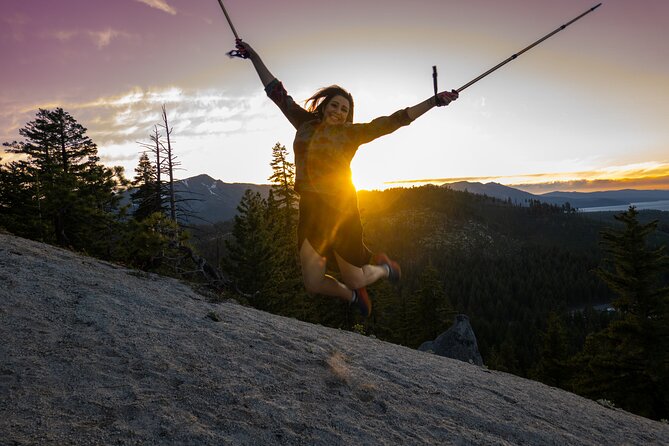
The middle stretch is described as Lake Tahoe Area, which usually means you’re working through terrain that gives you variety: different angles, different vantage points, and more chances to stop without feeling stuck at one location.
This section is where you’ll likely get more of the “how” behind the photos. The guide isn’t just snapping images; they’ll point out how to frame your shot with the sky, the water, and the surrounding valleys in mind. Guests specifically call out phone photography tips—so if you’re shooting with an iPhone or similar smartphone, this is where the instructions can click.
I’d treat this stop as a reset moment:
- Take a few photos of just Tahoe scenery so you’ll have backgrounds for later.
- Then capture shots that include people (self-timer or the guide’s help) before the golden light tightens.
Also, since the group is small, you can ask quick questions without making it a big production. That matters if you’re trying to get a specific pose for engagement or family photos.
Stop 3: Nevada-side boulders, steep effort, and 360-degree sunset views
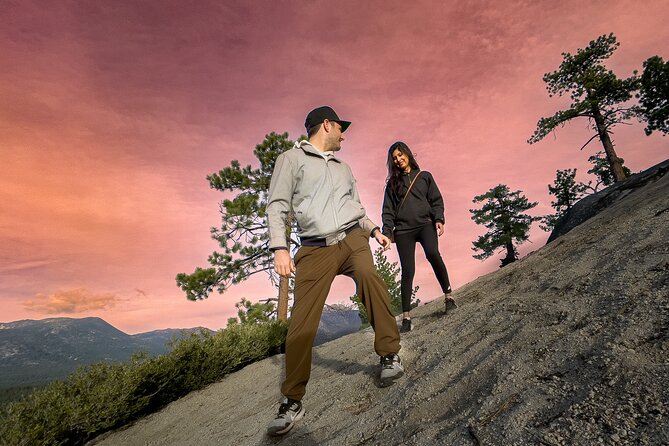
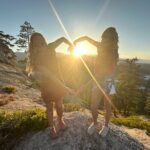
The finale is Lake Tahoe (Nevada)—and it’s where the “romantic 360-degree” promise becomes real. This is the part where the hike’s effort pays off: you’re climbing, exploring, and getting positioned for that last sharp burst of sunset color.
Expect boulders and summit exploration. Past guests mentioned climbing boulders at the summit and finding the hike challenging but worth it for the epic scenery and sunset payoff. One review also notes the views being so strong that it felt like the part that mattered most.
This stop is also where photo opportunities multiply:
- The guide takes photos of you from angles that work with the light.
- You get a chance to shoot Tahoe, Mt. Tallac, and nearby valleys on your own (as mentioned in the tour description).
- You’ll likely spend time just looking, since 360-degree views make it harder to scroll past the real scene.
Keep in mind the terrain here. If the tour includes steep elevations and boulders, you want to move carefully. If you rush, you’ll trip. If you take a steady pace, the summit experience feels more rewarding.
And if you’re lucky, you might catch wildlife from a safe distance. One guest mentioned seeing a mama bear with her cubs. You never want to chase wildlife, but it’s a reminder that these viewpoints aren’t just staged scenery—they’re real habitat.
What it feels like during the 2-hour climb
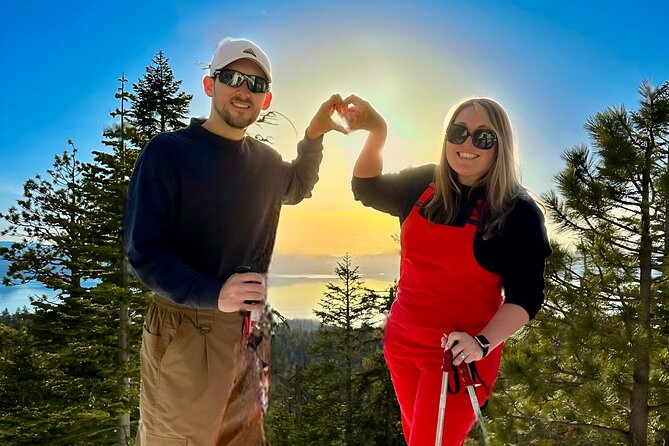
Even though it’s only around two hours, the hike doesn’t feel rushed. The structure is built around:
- moving during the earlier light,
- pausing for photo guidance,
- and spending enough time at higher viewpoints for sunset.
That’s the best way to do a sunset hike. The trick is pacing. You want a guide who manages timing so you don’t arrive at the views too early (when the light is flat) or too late (when it’s already fading).
Guides in previous experiences were described as entertaining and knowledgeable, and the overall tone from the guides seems to be friendly and upbeat. That matters because when you’re climbing, humor and calm leadership keep the experience from feeling stressful.
Also, this is the kind of activity where people bring a partner, family, or small group for a special photo moment. If you’re celebrating something, the timing near the summit can turn into a natural backdrop for proposals and portraits.
Gear and extras: poles, boots, and simple summit snacks
Included gear is solid for a hike like this: hiking poles and adventure photos. Rental hiking boots are available if you reach out, which is helpful if your travel footwear isn’t built for uneven trail.
Food isn’t included. But the tour suggests bringing snacks—and even wine and cheese or a cold beer at the summit if you want to make it feel more like a celebration. You can keep it simple: a snack bar, a couple of small bites, and water (not listed, but you’ll still want something to drink).
Think of this as a hike you do for:
- the climb,
- the views,
- and the photos you’ll actually want to keep.
If you treat the summit like a moment to refuel and enjoy the scene, the whole experience feels richer.
Who should book this sunset photo hike
This tour fits best if you want a guided hiking-and-photo experience with real sunset payoff.
You’ll likely love it if:
- you care about getting photos where you’re actually in the frame,
- you’re comfortable with moderate exertion and steep stretches,
- you want a romantic couple vibe, family photos, or event portraits,
- and you like the idea of a small-group hike rather than a big bus-style outing.
You might want to skip or choose something easier if:
- you’re a beginner or inexperienced hiker,
- you’re worried about high elevation sensitivity,
- or you prefer fully paved, flat walking.
One more practical tip: this hike is frequently booked ahead. It’s often reserved about 37 days in advance on average, so don’t wait until the last week if your dates are firm.
Should you book Tahoe Outdoor Adventures for a sunset photo hike?
I’d book it if your dream Tahoe evening is part scenery, part photography, and part feel-good adventure—with a guide who actively helps you get the shot, not just the hike. The best reason to choose this one is the combination of small-group attention and photo coaching built into a sunset hike that rewards effort with big views.
If you’re chasing a casual walk or you’re worried about steep climbing, you’ll probably be happier on an easier trail day. But if you can handle moderate fitness and you want the summit and golden light to be the main event, this is a strong bet for South Lake Tahoe.
FAQ
How long is the sunset hike?
It runs about 2 hours (approx.) and ends back at the original meeting point in South Lake Tahoe.
How many people are in the group?
The experience has a maximum of 15 travelers, which is meant to keep it personal.
Is this hike suitable for beginners?
It’s not advised for beginner or inexperienced hikers. The route can include steep elevations and climbing.
What photography help do I get?
You’ll receive adventure photos and you’ll get tips on best photo spots. The guide will also take photos of you while you hike.
What’s included, and can I get hiking boots?
Included items are hiking poles and adventure photos, plus a small-group tour with all fees and taxes. Rental hiking boots may be available if you reach out to ask.
Do I need to bring snacks?
Snacks are not included. The experience suggests you can bring things like wine and cheese or even a cold beer to enjoy at the summit.
What happens if the weather is bad?
This experience requires good weather. If it’s canceled due to poor weather, you’ll be offered a different date or a full refund.