REVIEW · ODDA
Trolltunga: Trolltunga Summer Hike
Book on GetYourGuide →Operated by Trolltunga Active AS · Bookable on GetYourGuide
One rock. One wild drop. Big Norway views.
This guided Trolltunga hike is interesting because the day is built around guided pacing and the famous viewpoint payoff. I like that you get real support (safety kit, poles, motivation) rather than just being dropped on a trail, and the Ringedalsvatnet views show up as you earn them.
What makes it feel special is the combination of long-distance effort and smart, human help at the right moments. The photo support is a big deal too, including the chance at the very specific “needle” angle when conditions let the guide do a controlled rappel.
The main thing to think about: this is still a serious hike. Even with the shuttle and guidance, you should plan for a long day and come ready for steep terrain and changing trail conditions.
In This Review
- Key things that make this Trolltunga hike work
- The point of Trolltunga: that 700-meter moment
- Starting in Skjeggedal: P2 meeting point and the P3 shuttle
- The hike rhythm: uphill start, viewpoint stops, and snack breaks
- Ringedalsvatnet and Folgefonna: what the views are really telling you
- Trolltunga itself: that rock formation plus the “needle” photo moment
- Gear and weather: what to pack for real mountain conditions
- Price and value: why $183 can make sense here
- Guides can make or break this day (Anke, Marty, Barbara)
- Who should do this hike, and who should skip it
- Quick reality check: timing, photos, and how to avoid the common mistakes
- Should you book the guided Trolltunga Summer Hike?
- FAQ
- Where do I meet for the Trolltunga hike?
- Is the shuttle bus included?
- How long is the hike?
- What gear is provided?
- What should I bring?
- Is this hike suitable for everyone?
Key things that make this Trolltunga hike work
Shuttle from P2 to P3 to save your legs early
Safety-first guidance with poles and first-aid gear
Real viewpoint breaks for snacks, photos, and breathers
Blue Ringedalsvatnet + distant Folgefonna Glacier views
Your guide helps you get the right shots at Trolltunga
Microspikes or snowshoes may be needed early or late season
The point of Trolltunga: that 700-meter moment
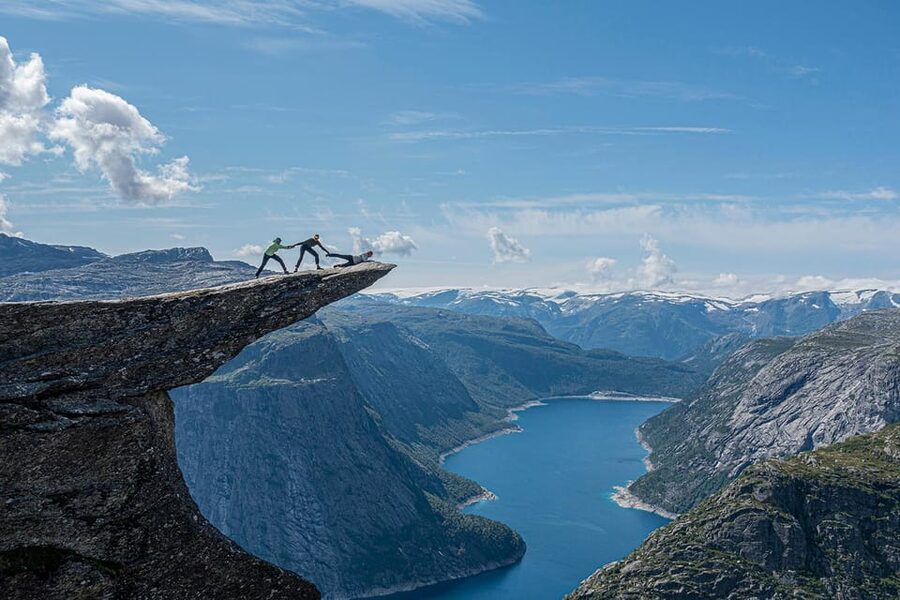
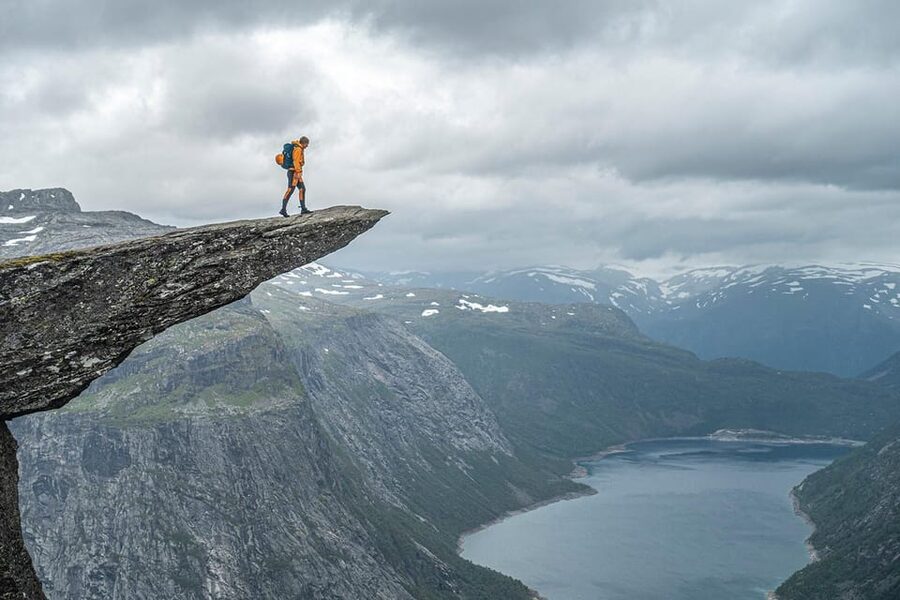
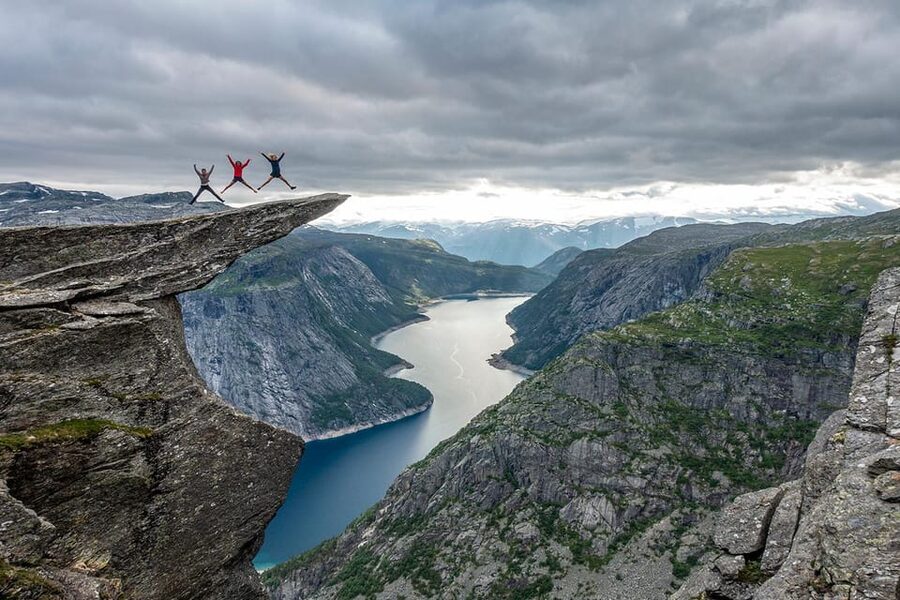
Trolltunga is famous for a reason: the rock sticks out like a dare, about 700 meters above the valley. When you finally stand close to the edge, the scale hits fast. You’re not just looking at a photo-famous spot. You’re looking down at distance, depth, and weather all at once.
A guided format matters here because this isn’t a casual stroll. Your guide’s job is to keep the day moving at a steady pace, make sure you don’t rush the steep parts, and help you find the best places to stop without turning the hike into a stress test. That turns the viewpoint from a goal into an experience.
I also like the way the day is paced for enjoyment. You still work for the view, but you get breaks for snacks and photos instead of hiking on autopilot. That’s how you come out energized, not wrecked.
You can also read our reviews of more tours and experiences in Odda.
Starting in Skjeggedal: P2 meeting point and the P3 shuttle
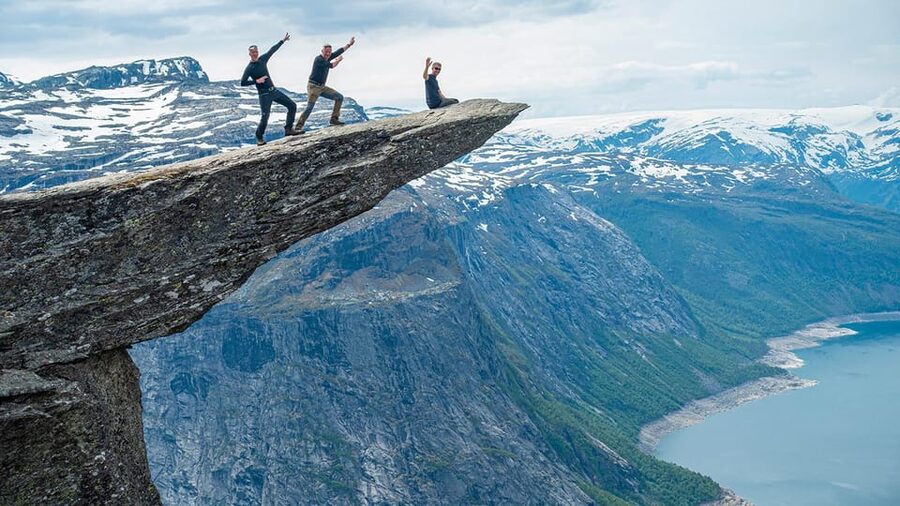
You meet at Trolltunga Active Base/shop next to the P2 parking in Skjeggedal. From there, you take a shuttle bus from P2 to P3 to start the hike at the higher point and save energy for the harder trail segments.
That shuttle is one of those small logistics upgrades that actually matter. Hiking Trolltunga is mostly about managing time and effort. If you can cut the approach, you’re less likely to arrive at the steep sections under-fueled or tired.
One note: the transport from P2 to P3 and back is listed as weather-dependent. If conditions don’t allow it, you’ll need to absorb a little more time on your feet. That’s not a deal-breaker, but it is part of Norway mountain reality.
The hike rhythm: uphill start, viewpoint stops, and snack breaks
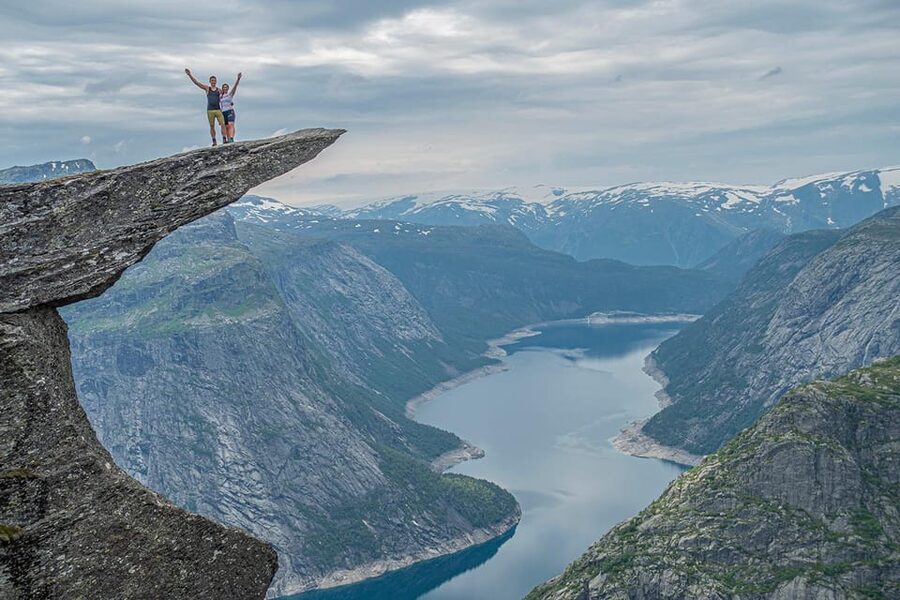
After you start at P3, expect an initial push uphill. The good news is that the terrain becomes milder after that first steep section, so you’re not stuck climbing non-stop for hours.
On the way, you’ll get multiple viewpoints. This is not just scenic wallpaper. Each stop helps you understand the valley’s shape and how steep the terrain really is—useful for staying grounded when the trail gets demanding.
The day also includes small stops for snacks and drinks. You’ll want to treat these as part of your plan, not optional extras. Bring food you can handle while hiking: sandwiches, nuts, chocolate, or bananas are listed as ideas, plus the guidance to carry enough for the long day.
And yes, your guide keeps the mood up. The best hikes aren’t only about views—they’re about pacing and morale. The guide role here is part storytelling, part practical motivation, and part logistics management so you can focus on walking and looking.
Ringedalsvatnet and Folgefonna: what the views are really telling you
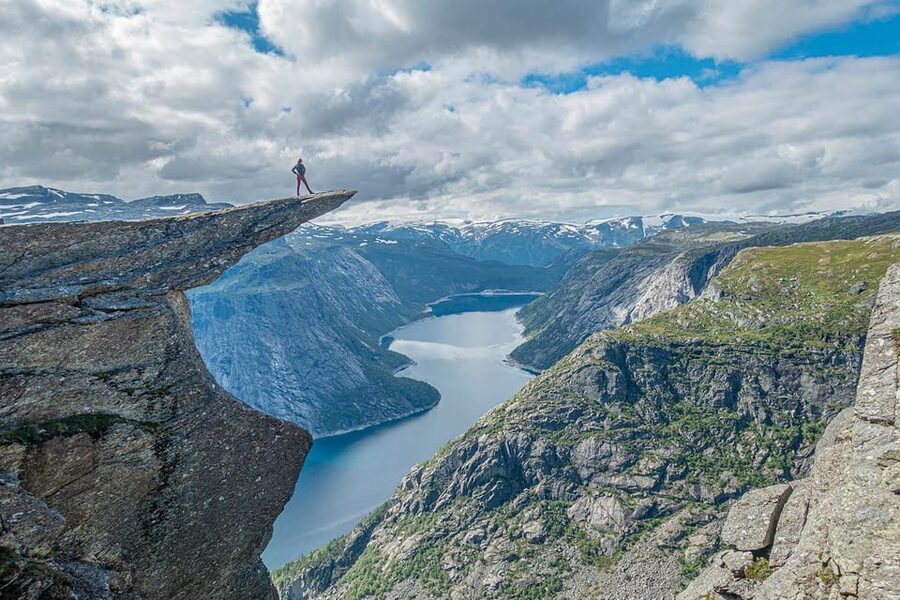
Once you’re moving through the valley sections, the blue lake Ringedalsvatnet becomes a key visual anchor. It shows up as you go, and it’s one of the reasons the hike feels so rewarding even before you reach Trolltunga.
Then there’s the distant Folgefonna Glacier. You don’t reach it on foot in this hike, but seeing it in the far distance gives you context. Norway at this scale isn’t just pretty; it’s physical. Water, ice, and cliff lines all line up in a way you don’t get from a viewpoint postcard.
What you should do when you reach the best view zones: pause long enough for your eyes to adjust. The trail gives you quick glimpses. At stops, take 30 seconds longer than you think you need. The valley depth and the lake placement make a lot more sense once you settle your gaze.
Trolltunga itself: that rock formation plus the “needle” photo moment
Reaching Trolltunga means standing beside the famous rock formation that peeks out 700 meters above the valley. This is the payoff point, but it’s also the trickiest part in terms of nerves and footing—so having a guide matters even when you feel strong.
A unique detail: the guides help with photos during the whole tour, and there can be special photos from a specific angle described as the “needle” view. When weather conditions allow, the guide may abseil/rappel down to get the best shots of you from below and to the side.
That’s a big reason to consider going guided instead of solo. You’re not only buying a view—you’re buying better odds of getting the angle you came for, and you’re doing it with a safety-focused team managing risks near the edge.
After the photo moment, you get a bit more time at Trolltunga before heading back. That matters because the edge experience can be a quick photo frenzy if you’re not careful. Having time to slow down makes it feel like a real moment, not just a stop on a route.
Gear and weather: what to pack for real mountain conditions
This hike is listed for summer, but you should still pack like the mountain might surprise you. Your guide can bring tools like microspikes or snowshoes if needed, but that doesn’t replace you showing up ready for cold, wind, or rain.
Here’s the practical packing list that’s explicitly recommended:
- Comfortable shoes and hiking shoes
- Warm clothing plus a wind/waterproof shell jacket
- Rain gear if needed
- Snacks and water (about 1.5 liters) (and you can fill on some spots)
- A camera
- Backpack around 35 liters
Also listed: cap/hat, sunglasses and sunscreen, and mid layer. If rain and low temperatures are forecasted, they suggest wool base layers (not cotton), warm mid layer, waterproof shell pants, spare socks, beanie/headband, and gloves. That’s the Norway version of saying: dress in layers and keep your feet and core dry.
Microspikes/snowshoes might be required early or late in the season. Even if you’re visiting in peak months, it’s smart to plan for the possibility of cold patches or slippery sections.
One more “you can’t fake this” item: food. The guidance calls for bringing a lot of food, not just one snack. For a long day, energy is your best form of comfort.
Price and value: why $183 can make sense here
The price is $183 per person, and the value isn’t just that there’s a guide. You’re getting a package built for a demanding viewpoint hike.
Included items worth factoring in:
- A professional guide who carries safety and first aid equipment
- Hiking poles
- Microspikes or snowshoes if needed
- Information on local nature and history
- Guide-led photo help across the hike
- Special “needle” view photos when weather allows rappel
- Transport from P2 to P3 and back if weather allows
When you do the math, you’re paying for risk management, pacing, and the photo payoff. The shuttle also reduces how long you spend just getting to the harder sections. That’s not a luxury—it’s part of why this hike feels “stress-free” compared with trying to coordinate everything yourself.
Could you hike it independently? Sure, people do. But if your goal is to get to Trolltunga, enjoy the journey, and come away with the right photos without turning the day into a logistics project, this format is usually the smarter use of time and energy.
Guides can make or break this day (Anke, Marty, Barbara)
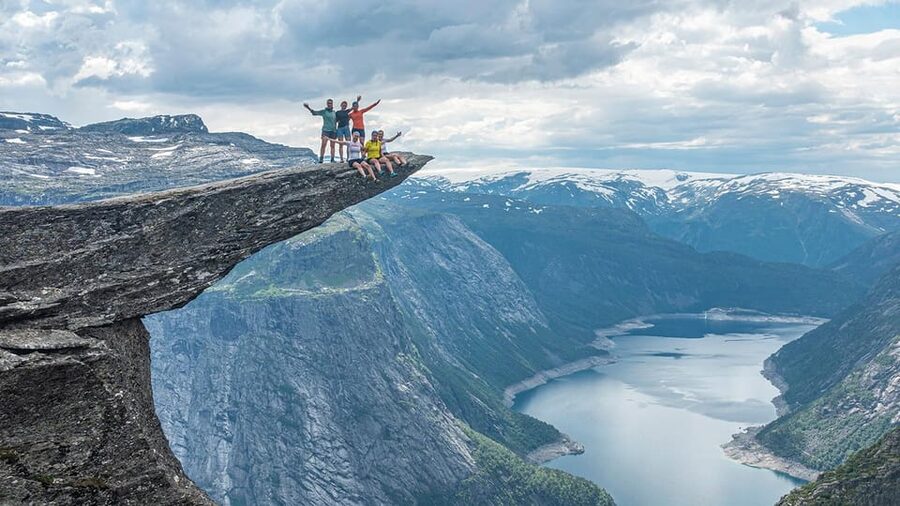
Some hikes are about scenery. This one is about scenery plus stamina plus confidence near exposed areas. The guide isn’t a “nice-to-have” here.
From the experience feedback you’ve got in front of you, guides like Anke are praised for being kind, welcoming, and strong on local knowledge—especially weather awareness and storytelling about plants and old mountain tales. That kind of guidance turns the trail into something you can remember, not just something you survived.
You’ll also see praise for conversational, organized guiding like Marty, with good group handling and focus on working toward that photo moment at Trolltunga. And Barbara is mentioned as professional and fun—also a good reminder that motivation and group energy matter when your legs start getting loud.
Bottom line: when the guide keeps breaks purposeful and helps you nail the right vantage points, the whole day feels easier. Not shorter—just more enjoyable.
Who should do this hike, and who should skip it
This Trolltunga hike is not for everyone. It’s listed as not suitable for:
- Pregnant women
- People with heart problems
- People with low level of fitness
Also consider the time commitment seriously. The duration is listed as 10 hours, but the hike time can range based on trail and conditions. One guide note says the hike can take 7–9 hours, and another timing note suggests 9–12 hours for the rest of the summer trail. Either way, plan for a full day.
If you’re fit, steady on your feet, and comfortable with a long hike, you’re a great match. If you’re unsure, be honest with yourself about pace and steep sections. Trolltunga isn’t the place to “see how it goes.”
Quick reality check: timing, photos, and how to avoid the common mistakes
Here’s how you’ll get the best version of this day:
- Start with energy. Use the shuttle to arrive fresher for the real climb.
- Eat small and often. Take advantage of the snack stops and don’t wait until you feel shaky.
- Bring the weather gear. Wind and rain change comfort fast.
- Make peace with the fact it’s long. Trolltunga time is earned, not rushed.
The other smart move is to treat the viewpoints as checkpoints for understanding, not just Instagram backdrops. When you see the valley and the lake appear, you’ll feel more confident moving forward—because you can map the terrain in your head.
Should you book the guided Trolltunga Summer Hike?
Book it if your priority is a high-quality Trolltunga viewpoint day with safety support, pacing, and real help getting the photos you came for. The included poles, optional traction gear, shuttle timing help, and guide-led photo moments (including the “needle” angle when possible) make the price feel more like paying for certainty and less like paying for a ticket.
Skip it if you know you can’t handle a long, steep day, or if you fall into the listed non-suitable categories. Also skip if you’re hoping to keep the experience very casual. This is a full hike, not a quick walk to a lookout.
If you want one clear decision rule: if you can commit to good footwear, layered clothing, plenty of food, and a long day on your feet, this guided approach is the way to maximize your odds of a great Trolltunga moment.
FAQ
Where do I meet for the Trolltunga hike?
You meet at Trolltunga Active Base/shop next to the P2 parking in Skjeggedal.
Is the shuttle bus included?
Transport from P2 to P3 and back is included if weather conditions allow it.
How long is the hike?
The tour duration is listed as 10 hours. The hiking time can take 7–9 hours, and the summer trail hike time may be longer depending on conditions.
What gear is provided?
The tour includes hiking poles. Micro spikes or snowshoes are provided if needed.
What should I bring?
Bring comfortable/hiking shoes, warm clothing, rain gear, a camera, snacks, and about 1.5 liters of water (you may be able to fill at some spots). A backpack around 35 liters is recommended, along with layers like a mid layer and shell jacket.
Is this hike suitable for everyone?
No. It’s listed as not suitable for pregnant women, people with heart problems, and people with low level of fitness.