REVIEW · MEXICO CITY
From Mexico City: 2-Day Pico de Orizaba Summit Trek
Book on GetYourGuide →Operated by Travesías México · Bookable on GetYourGuide
Mexico’s highest climb starts before dawn. What makes this trek special is the glacier sunrise on Pico de Orizaba and the way you get handled by experienced guides with real mountaineering safety support. The big consideration is altitude: you’re climbing to about 5,700 meters, so you need excellent fitness and you really can’t treat acclimatization like a formality.
The whole rhythm feels well designed: you ride in by 4×4 to the Piedra Grande area, sleep near the climb, then practice with crampons and an ice axe before you ever go for the summit. One night in a simple mountain hut (not a hotel) keeps things grounded, and that practical setting is part of what makes the hike feel like a true expedition.
In This Review
- Key reasons this trek ranks high
- From Mexico City to Piedra Grande hut: getting positioned right
- The first afternoon: acclimatization walk plus crampon practice
- Day two before dawn: the sunrise you came for
- Summit time and the descent back to the hut
- Guides and safety gear: why the details matter on ice
- Food, overnight hut comfort, and realistic expectations
- Price and what you’re really paying for at $599
- What to bring so cold and long hours don’t beat you
- Who this trek is best for (and who should skip it)
- Should you book this 2-day Pico de Orizaba summit trek?
- FAQ
- Where is the meeting point for this trek?
- How long is the Pico de Orizaba summit trek?
- What meals are included?
- What safety and mountaineering gear comes with the tour?
- What language is the guide available in?
- How big is the group?
- What should I bring for the cold and snow?
- Who should not join this trek?
- Is there free cancellation?
Key reasons this trek ranks high
- Sunrise timing at the glacier: you’re positioned early so the first light hits the ice and the crater area
- Hands-on crampon and ice-axe training: you don’t just get told what to do
- Qualified, safety-focused guidance: guides manage pace, technique, and comfort
- Small group up to 15: less crowding, more attention on your steps
- Included gear you’d otherwise rent: head lamp, helmet, crampons, ice axe, and safety equipment
- Overnight at Piedra Grande hut: acclimatize, rest, and reset for a summit push
From Mexico City to Piedra Grande hut: getting positioned right
This trek is built around one simple fact: Pico de Orizaba is remote, high, and not the place you want to improvise transportation or gear. You meet at the corner of Vicente Suarez and Michoacan, by the benches in front of the market, then head out from Mexico City toward Tlachichuca in Puebla.
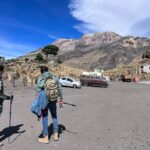
Once you’re in the area, you transfer by 4×4 up to the mountain hut area at Piedra Grande. That ride matters more than it sounds. Instead of burning energy hiking toward the start of the real climb, the drive gets you close enough to focus on acclimatizing and learning the tools you’ll use the next day.
You’ll also feel the altitude shift quickly once you’re near the start zone. The air gets thinner, the temperatures drop, and you start paying attention to warmth management and breathing. This is the point where good guides keep things calm and practical: you’re there to work smart, not to race.
You can also read our reviews of more tours and experiences in Mexico City.


The first afternoon: acclimatization walk plus crampon practice
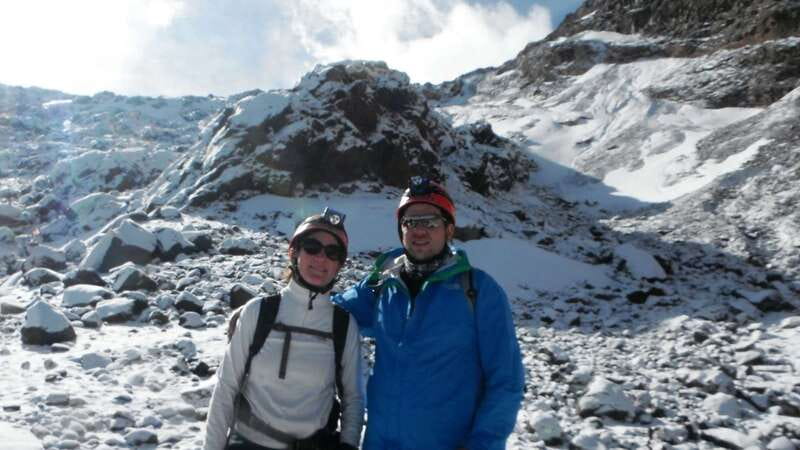
The first day is about setting you up to succeed on day two. After you arrive at the hut, you’ll do an acclimatization walk and practice using crampons and an ice axe. Even if you’re fit, this step is huge. Walking in snow or ice is different from hiking on dry trails, and you want your feet to feel stable before you aim for the summit.
Crampon practice usually covers getting comfortable with traction and learning how your weight transfers. Ice-axe practice helps you build confidence on steep sections and when the ground gets uneven. If this is your first time with this equipment, you’ll likely appreciate how you get feedback instead of guessing.
Then you return to the hut, have dinner, prepare for the next day, and get sleep. The hut is basic, but that’s part of the appeal. One of the strong themes from past trekkers is how the simple hut setting makes the experience feel authentic, especially with a hearty Mexican dinner prepared like a real expedition meal rather than a sad afterthought.
My advice: treat this first night like part of the climb, not an overnight break. You’ll sleep better if you keep your thermal clothing strategy simple and avoid over-layering until you find what works for you.
Day two before dawn: the sunrise you came for
Day two starts early, before sunrise. You’re moving while it’s still dark, with headlamps provided (so you’re not hunting for gear at altitude). Cold mornings on snow climbs can feel sharper than you expect, so warm layers and gloves are not optional.
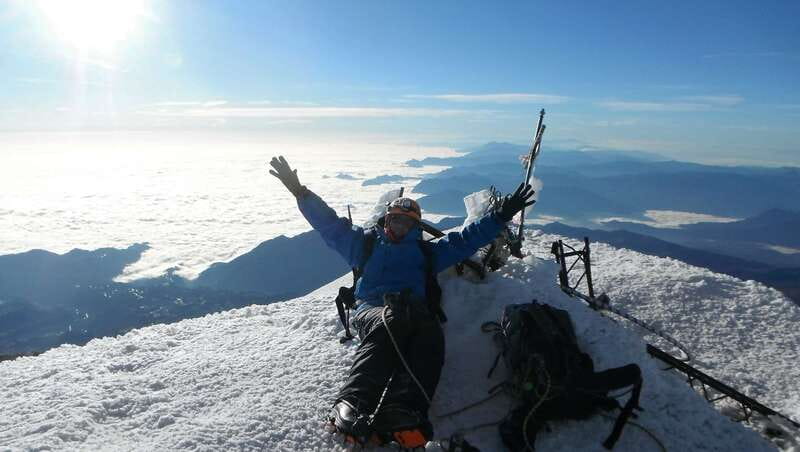
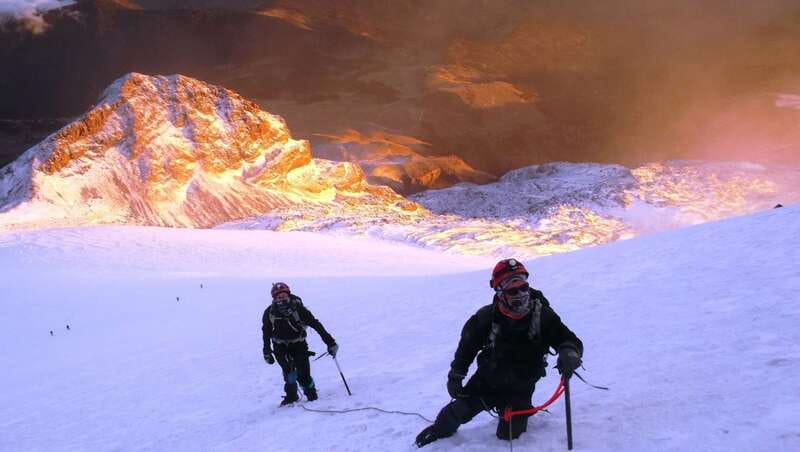
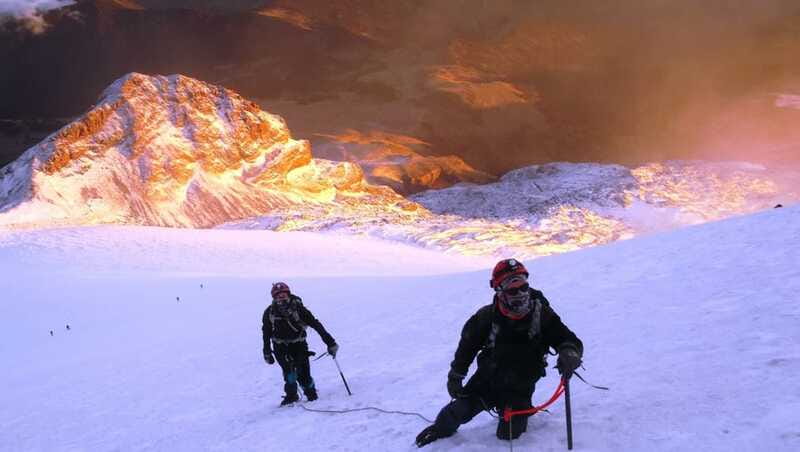
The payoff starts right around the time you get your bearings for the climb. You’ll be well positioned for the sunrise and the moment when light glints off the glacier leading toward the crater area. This is one of those “only at this altitude” moments: you can’t replicate it from a viewpoint in town.
From there, you follow the glacier route toward the summit. Expect steady, hard walking. This isn’t a stroll, and it’s not a technical climb where you mostly scramble. It’s a sustained effort where crampon placement, breathing, and conserving energy count.
You’ll aim for the summit at around 5,700 meters, the highest peak in Mexico and among the highest points in North America. That number looks simple on paper, but your body will tell you it’s not. Pace matters. Guides typically manage that by keeping you moving consistently and preventing early overexertion, which is one of the best ways to make high-altitude trekking feel possible.
Summit time and the descent back to the hut
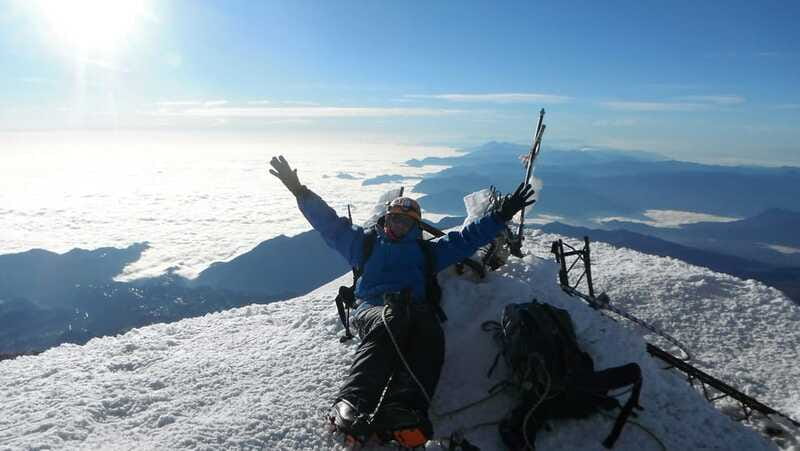
At the summit, it’s all about views and breathing. You’re high enough that weather, clouds, and light can change fast, so you enjoy what’s there and don’t waste the moment. The crater area and the surrounding valleys can look huge from up there, even if you’ve seen photos before.
After summit time, you descend to the hut. This part can be mentally easier, but physically it can still be demanding. Snow and ice aren’t automatically gentle on the way down. Good crampon technique helps you keep control and avoid sliding or overstressing your legs.
Once you reach the hut again, transport waits for the route back toward Tlachichuca. After that, you’ll eat a restorative meal before heading back to Mexico City. The sequence is important: summit success still means you need fuel and recovery afterward, and the plan respects that instead of rushing you off the mountain immediately.
Guides and safety gear: why the details matter on ice
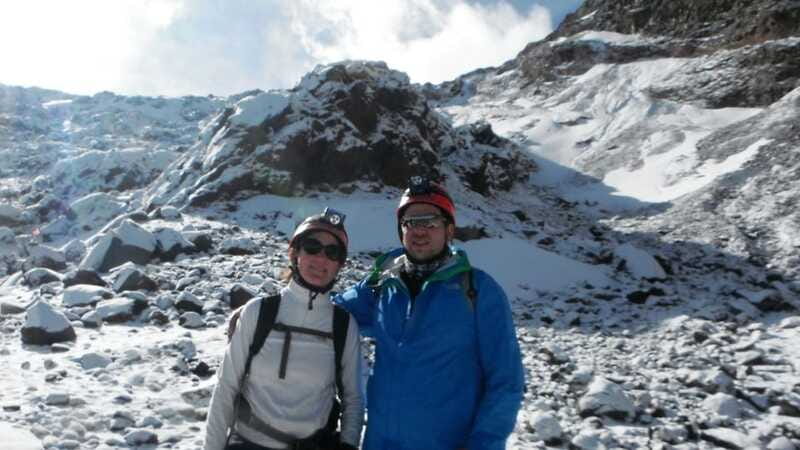
This is where value shows up in a way you can feel. You’re not just buying a hike. You’re buying qualified guides, accident insurance, and the safety system you need for glacier travel.
Multiple guides have earned praise for staying calm and supportive. People talk about feeling safe the whole way, and that comes from more than confidence. It comes from instruction that’s clear, patience when someone struggles, and pacing that matches the group without leaving you behind.
Guide names that stood out in earlier experiences include Bernardino, Alan, and Carlos. There’s also a recurring mention of a 4×4 driver named Bentito. While one guide may fit your style better than another, the common theme is how they manage the climb with technique and care rather than ego.
The included gear list is also practical:
- helmet
- head lamp
- crampons and ice axe
- safety equipment
- transport and one night accommodation
- entrance fees (so you’re not tracking paperwork on your trip)
That’s a lot to have lined up for you, and it matters at altitude. If you’ve ever had a trip ruined by missing rentals or mismatched gear, you’ll recognize why this setup is worth paying for.

Food, overnight hut comfort, and realistic expectations
Let’s talk about the hut. It’s not a boutique lodge, and it’s not trying to be. You’re sleeping in a mountain hut at Piedra Grande for one night, and the tradeoff is that you’re close to the climb and you get the acclimatization benefit of being there.
Meals are included both days:
- Day 1: lunch and dinner
- Day 2: breakfast and lunch
One of the best described moments from previous trekkers is the Mexican dinner served in a simple hut setting, even when it’s prepared via a camping-kitchen approach. That’s the kind of detail that often gets overlooked, but it’s exactly what you want when you’re tired, cold, and hungry.
Pack a strategy for the night too. Since a sleeping bag is listed for what to bring, plan on using it rather than relying on guesswork. If you get cold easily, you’ll want thermal layers ready for when you stop moving.
Price and what you’re really paying for at $599
$599 per person for a 2-day high-altitude summit trek from Mexico City isn’t cheap. But you’re also not paying for a basic hike.
For that price, you’re getting:
- a small group capped at 15
- qualified guides for summit-day glacier travel
- accident insurance
- transport to Tlachichuca and the 4×4 ride up
- one night accommodation at Piedra Grande
- full meal coverage across two days (minus alcoholic drinks)
- safety and mountaineering equipment like crampons, ice axe, helmet, and headlamp
- entrance fees
If you tried to piece this together yourself, the cost tends to balloon fast once you include proper gear, guide services, permits/fees, and accident coverage. Here, the structure is already handled, which is the part that protects your time and lowers risk.
One note: alcoholic drinks are not included. That’s normal for a cold, safety-driven environment. Keep the focus on hydration, calories, and rest.
What to bring so cold and long hours don’t beat you
Your packing list is straightforward, and it’s built for snow, cold, and early starts. Here are the items you should treat as non-negotiable based on what’s listed:
- warm clothing and thermal clothing (for before dawn and after you stop)
- gloves and hat
- sunglasses and sunscreen (glacier glare is real)
- rain gear (mountain weather shifts)
- hiking shoes (the list says hiking shoes; pair with your crampon system as instructed)
- a daypack
- toiletries and change of clothes
- sleeping bag
- towel
- luggage-friendly layers so you’re not carrying everything unnecessarily
A practical trick: pack your “cold kit” so you can reach it quickly at the start of day two. When you’re cold and moving in the dark, digging through your bag wastes warmth and energy.
Who this trek is best for (and who should skip it)
This trek is serious. It requires you to be in excellent physical condition, and it’s recommended you have previous mountaineering experience. Even if you’re a strong hiker, glacier travel and ice-tool use are different enough that you’ll want to respect the learning curve.
It also isn’t suitable for:
- pregnant women
- people with haemophilia
- people with heart problems
- people with back problems
If you’re unsure where you fit, take that seriously. The safest choice is the one that keeps you within your body’s limits.
On the other hand, if you’re comfortable with hard physical days, eager to learn crampon and ice-axe technique, and ready for a demanding summit schedule, this is a great match. The small group setup helps, and the guidance style reported by past trekkers suggests you won’t be left on your own.
Should you book this 2-day Pico de Orizaba summit trek?
Book it if you want a real high-altitude experience with glacier skills, solid guiding, and a plan that respects acclimatization and safety. I especially like that the equipment is included and that the first day focuses on getting you ready rather than throwing you straight into summit attempts.
Think twice if you’re not confident about altitude, cold endurance, or mountaineering basics. The trek is designed for people who can handle hard effort at height, not for a casual “bucket list hike.”
If you do go, go prepared with thermal layers, gloves, rain gear, and a sleeping bag. And when your guide slows you down to protect your summit chances, treat that as good climbing strategy, not wasted time. On Pico de Orizaba, pacing is everything.
FAQ
Where is the meeting point for this trek?
You meet at the corner of Vicente Suarez and Michoacan, at the benches in front of the market.
How long is the Pico de Orizaba summit trek?
The trek runs for 2 days.
What meals are included?
Lunch and dinner are included on the first day. Breakfast and lunch are included on the second day.
What safety and mountaineering gear comes with the tour?
The tour includes safety equipment plus head lamp, helmet, crampons, and an ice axe.
What language is the guide available in?
The live tour guide is available in English and Spanish.
How big is the group?
This is a small group limited to 15 participants.
What should I bring for the cold and snow?
Bring a sleeping bag, warm and thermal clothing, gloves, hat, hiking shoes, sunscreen, sunglasses, rain gear, a daypack, toiletries, towel, and change of clothes.
Who should not join this trek?
It is not suitable for pregnant women, people with haemophilia, people with heart problems, or people with back problems.
Is there free cancellation?
Yes. You can cancel up to 24 hours in advance for a full refund.