REVIEW · YOSEMITE NATIONAL PARK
Yosemite Day Hike from Glacier Point Including Panorama Trail
Book on Viator →Operated by Lasting Adventures · Bookable on Viator
Glacier Point views start the whole day right. This guided hike strings together the big Yosemite moments in one plan: Half Dome from above, plus classic waterfall scenery on the way down. I like that the route is built for real viewpoints (not just pass-by photos), and that you’re walking with an expert who connects what you’re seeing to how Yosemite works.
What I really love is the way the day splits effort and reward. You get a long downhill day on Panorama Trail and either Mist Trail or the John Muir Trail, so the scenery keeps moving even when your legs start bargaining. You’ll also pause at key spots—like Illilouette Fall and the top of Nevada Fall—so the hike doesn’t feel like one continuous grind.
One consideration: this is moderately strenuous hiking with a real elevation drop (over 3,000 feet), and it’s weather-dependent. If you’re not steady on steep grades or lots of stairs, you may want to think twice or plan for a slower pace and careful footing.
In This Review
- Key Things You’ll Remember
- Glacier Point to the Valley: Why This Route Works
- The Morning Transfer: Getting Oriented on the Way to Glacier Point
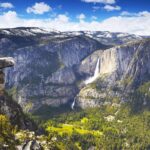
- Glacier Point: Half Dome Views Before the Descent
- Vernal Fall to Illilouette Fall: Famous Waterfalls, Real Trail Time
- Panorama Trail: The Valley Opens Up
- Top of Nevada Fall: Lunch With a View
- Mist Trail vs John Muir Trail: Two Ways Down, Same Finale
- Mist Trail: Granite Staircases and Merced River Power
- John Muir Trail: Less Stair-Heavy, Better High-Level Glimpses
- Both Choices Converge Later
- The Real Value Behind the $400 Price
- Guides, Pacing, and What Happens When You’re Tired
- Practical Tips: What to Pack and How to Get the Most From It
- Who Should Book This Hike (and Who Might Want a Softer Day)
- A Quick Decision Guide: Mist Trail Fan or John Muir Trail Chooser?
- Should You Book This Glacier Point Day Hike?
- FAQ
- What time does the hike start?
- How long is the hike?
- Which trails are available for the descent after lunch?
- Is Yosemite National Park entry included?
- What should I bring for food and water?
- Is the hike suitable for everyone?
- Are trekking poles provided?
Key Things You’ll Remember
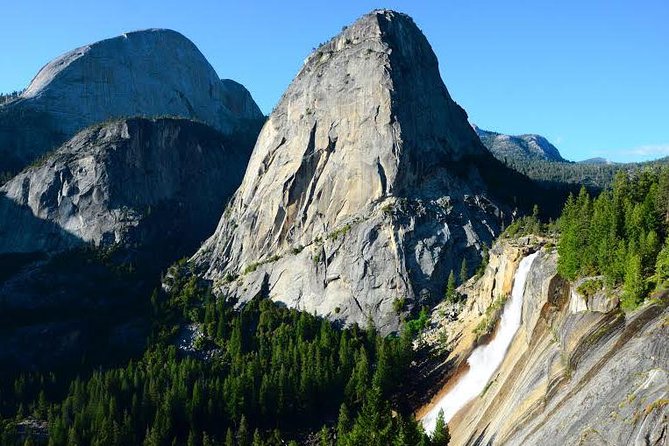
- Glacier Point start with Cloud’s Rest and Half Dome views before you even hit the trail
- Three waterfalls on the descent: Vernal Fall, Illilouette Fall, and Nevada Fall
- Panorama Trail living up to its name with long valley sightlines as you move
- Mist Trail stairs by the Merced River for maximum waterfall energy on the way down
- John Muir Trail option when you want a less stair-heavy descent with strong Half Dome views
- Guides with real field gear including first-aid kits and water-purification methods
Glacier Point to the Valley: Why This Route Works
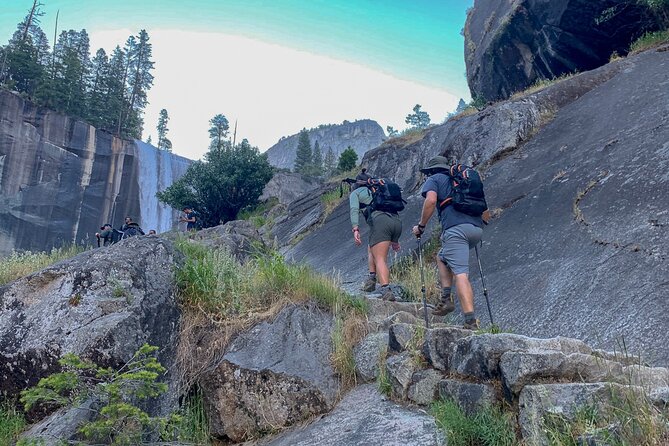
This day hike is built around a simple idea: you’ll see Yosemite at multiple “levels,” from high cliffs at Glacier Point to the valley floor at Happy Isles. That’s what makes it satisfying. Instead of one viewpoint and a backtrack, you get a full vertical story.
The route also saves you from decision fatigue. You’re not left to figure out how to combine trails or where the best breakpoints are. The day flows in a way that feels natural: get positioned at Glacier Point, walk down through famous waterfalls, then finish on one of the two classic descents.
And because it’s guided, you’re more likely to notice the details that make Yosemite more than postcard scenery—how the terrain shapes the trail and why these falls are where they are. You’ll also get help adjusting to conditions, which matters a lot on steep sections.
You can also read our reviews of more tours and experiences in Yosemite National Park.


The Morning Transfer: Getting Oriented on the Way to Glacier Point
You start at Yosemite Valley Lodge at 8:00 am. From there, you ride a shuttle for about an hour up to Glacier Point. What I like about this setup is that it reduces friction. You spend less time managing parking and connections, and more time arriving with your brain ready for what you’re about to see.
During the ride, you get narration about Yosemite’s famous features. That matters because Glacier Point isn’t just a photo stop—it sets your mental map. Once you can see how the big landmarks line up, the hike below starts to feel readable: Half Dome becomes a reference point, and the valley starts to look like a place you can actually move through.
When you arrive, you’ll be able to take in major views that include Half Dome and also Cloud’s Rest. This is also where you can snap photos before your legs start working.
Glacier Point: Half Dome Views Before the Descent
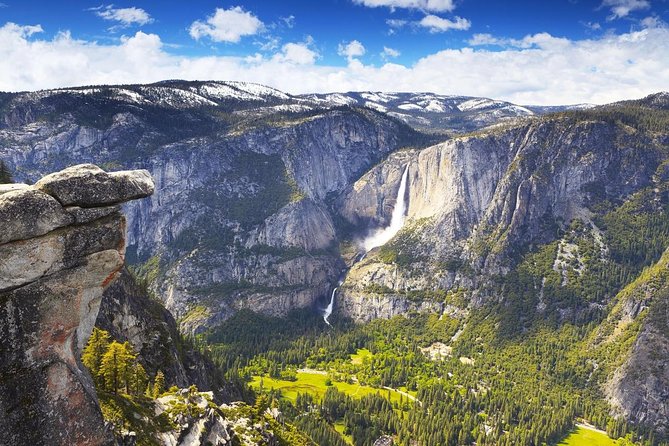
The first “wow” moment here isn’t the hike itself—it’s standing at Glacier Point and realizing how huge Yosemite feels. From this viewpoint, you can see a large slice of the park, including the area around Half Dome, plus the broader mountain backdrop. The stop is long enough that you don’t feel rushed, and your guides will talk about the historical significance of the vista.
Then it’s time to start walking.
The plan begins with a trek from Glacier Point down a route that connects three major waterfall experiences: Vernal Fall, Illilouette Fall, and Nevada Fall. That sequence is smart because it spaces the visual payoff. You’ll be looking at major water features while you’re still fresh, and you’ll pass the next one before you’ve completely worn out.
Vernal Fall to Illilouette Fall: Famous Waterfalls, Real Trail Time
As you head down, you’ll pass Vernal Fall first. This is the start of the day’s “soundtrack” effect: more water, more wind, more damp air. If you’ve only ever seen waterfalls from flat viewpoints, this part changes the feel. You’re not just observing; you’re moving through the area that creates the falls.
Then comes Illilouette Fall, where you’ll pause and take in the view from the top. This is a good breakpoint for two reasons. One, it gives you a moment to refuel. Two, it helps you reset your energy before the next chunk of switchbacks and effort.
The hike does include a solid physical element here. You descend a total of 3,179 feet (969 meters) over the day, and later there’s a climb back up about 300 feet (91 meters) after tackling switchbacks for roughly a mile. For me, that combo is important: a big downhill early, then a short uphill correction, which tends to keep the hike from feeling monotonous.
Panorama Trail: The Valley Opens Up
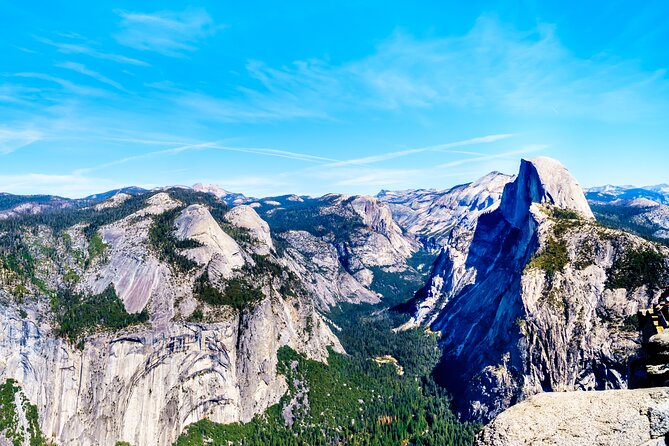
After the tougher switchback portion, the trail gives you something different: a more flat, scenic stretch toward the Panorama Trail. This is where your effort starts paying back with long, sweeping views.
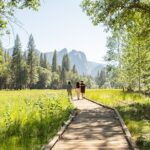
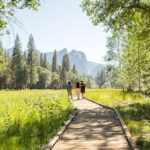
Panorama Trail lives up to its name because it’s designed for looking across Yosemite rather than just looking at one feature. You’ll keep seeing new angles on the valley as you walk. Half Dome stays in the frame often enough to remind you you’re moving toward it and away from it at different moments.
This is also one of the best parts for travel-style photos—not just quick snapshots. If you’re the type who likes to compare shots from different distances, this segment gives you multiple chances.

Top of Nevada Fall: Lunch With a View
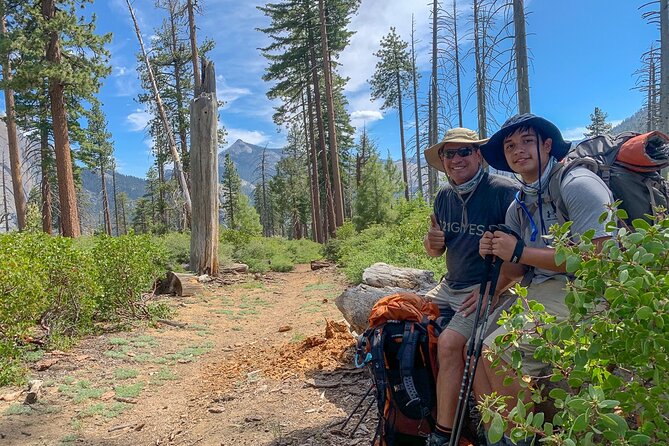
As you continue down, you’ll reach the top of Nevada Fall, where you stop for lunch. This is an ideal timing choice. It’s late enough in the hike that lunch actually feels earned, but early enough that you’re not already at the end of the day.
Your lunch plan is simple: bring your own food and drinks. Guides carry practical gear, but you should not count on snacks being available. Since you’re outdoors for about 9 hours 30 minutes total, plan for an actual meal plus extra small bites.
After lunch, you’ll choose your way down for the final leg.
Mist Trail vs John Muir Trail: Two Ways Down, Same Finale

This is where the tour gives you options, and you should choose based on what you want your legs to do.
Mist Trail: Granite Staircases and Merced River Power
If you want the classic “most intense waterfall energy” vibe, you’ll go down the Mist Trail. It runs alongside the Merced River and alongside the water from Vernal Fall and Nevada Fall.
The tradeoff is physical. Mist Trail includes the famous granite staircases, which can feel relentless if you’re not used to stairs. But the payoff is that you’re closer to the water’s presence. Expect the trail to feel more dramatic, with more mist and a more immersive atmosphere.
John Muir Trail: Less Stair-Heavy, Better High-Level Glimpses
If you’d rather reduce stair stress while still getting strong views, pick the John Muir Trail route. It’s described as less strenuous, and it offers higher vantage points with views of Half Dome, Vernal and Nevada Falls, and even Liberty Cap.
For many hikers, this is the smarter choice when conditions are mixed or when you know your knees will be your limiting factor. You still get big scenery, but you’re less likely to spend the final miles fighting every step.
Both Choices Converge Later
Good news: both trail options lead to restrooms at the bottom area of Vernal Fall, and then you’ll continue downhill to Happy Isles, where the tour ends. Then you’ll take a shuttle back to Yosemite Lodge.
That convergence is what makes the choice feel low-risk. You’re not choosing a totally different ending—you’re choosing how you want the descent to feel.
The Real Value Behind the $400 Price
At $400 per person, this is not a budget hike. But it also isn’t just someone pointing at a map. The value comes from a few concentrated pieces:
- Expert guidance on route navigation and on-the-ground pacing
- Shuttles to and from Glacier Point plus the return to Yosemite Lodge
- Help getting Yosemite’s entry setup sorted (including a Yosemite National Park Entry Reservation if implemented)
- Safety support: your guides carry first-aid kits and water-purification methods, plus practical items like sunscreen and bug repellent
- Option for trekking poles if you request them
The biggest “hidden cost” on your own is time. If you’re trying to stitch together shuttles, trailheads, and entry timing on your own, the day can become stressful fast—especially in peak season. Here, the plan is already built around doing the hike smoothly.
One more cost note: the tour does not include the Yosemite gate fee. That must be paid when you enter the park, so budget for that separately.
Guides, Pacing, and What Happens When You’re Tired
I love that this is a guided hike with a small-group feel. Your guide can slow down for footing, offer short explanations when you’re at a good viewpoint, and keep the group from falling apart when some people move faster than others.
If you get Janna, she’s been singled out in top feedback for being professional, courteous, and genuinely helpful on a full day Yosemite hike. That kind of guide matters because Yosemite days can get tiring. Good guidance helps you keep moving without rushing.
The best pacing trick is the one the tour naturally supports: multiple planned stops. You pause for views at waterfalls, you refuel at Illilouette Fall, and you take a real lunch at Nevada Fall. That structure matters more than you think when you’re walking downhill for hours.
Practical Tips: What to Pack and How to Get the Most From It
Because the route is long and includes steep sections, your packing should be boring and functional.
Bring:
- Hiking shoes (required) with solid traction
- Lunch, snacks, and water bottles (not included)
- Weather-appropriate layers (dress for changing conditions)
- Sunscreen and bug protection, though guides carry these too
If you want extra comfort, ask about trekking poles ahead of time. Poles can help a lot on long descents, especially if you choose the Mist Trail stairs.
Also plan for this:
- You’ll be moving for about 9 hours 30 minutes
- You’ll drop a lot of elevation and then still work through stairs and grades
- The tour runs May through October, so conditions can shift depending on the exact day
Finally, you’ll get confirmation within 48 hours of booking, subject to availability, and you’ll need to provide your date of birth at booking. If you won’t have cell service later, add a phone number where you can be reached before the hike.
Who Should Book This Hike (and Who Might Want a Softer Day)
This tour is a great match if you want:
- A full-day Yosemite experience with major landmarks connected in one itinerary
- A guided plan that takes stress out of logistics
- A descent that feels like a real adventure rather than a short walk between viewpoints
- The flexibility to choose Mist Trail or the John Muir Trail based on your comfort
It may not be the best fit if:
- You want an easy, flat stroll
- You’re uncomfortable with steep grades and lots of stair steps
- You’re sensitive to long outdoor time (this is a 9.5-hour day)
The sweet spot is “moderate fitness.” That means you can handle sustained walking plus a mix of downhill and a bit of uphill without needing frequent stops to recover.
A Quick Decision Guide: Mist Trail Fan or John Muir Trail Chooser?
Use this simple mindset:
- Pick Mist Trail if you want the waterfall closeness and don’t mind stairs. You’ll be near the Merced River and experience the falls in a more direct way.
- Pick John Muir Trail if you want a less strenuous descent with strong high views, including Half Dome and Liberty Cap.
Either way, the day ends the same way with the downhill to Happy Isles and a shuttle back.
Should You Book This Glacier Point Day Hike?
I’d book it if your idea of a great Yosemite day is big sights plus honest hiking time. This route is built to show you multiple sides of the park: Glacier Point’s scale, waterfall power as you descend, and then a valley-floor finish.
The price is high, but you’re paying for guided execution—shuttles, a structured plan, and safety support—rather than only for a set of views. If you can handle a moderately strenuous long hike, this is the kind of day that sticks in your memory for years.
If you’re unsure about the stamina piece, choose your trail preference carefully. Your legs will thank you later.
FAQ
What time does the hike start?
The tour starts at 8:00 am, with meeting at Yosemite Valley Lodge.
How long is the hike?
The duration is about 9 hours 30 minutes (approx.).
Which trails are available for the descent after lunch?
After lunch near the top of Nevada Fall, you choose between the Mist Trail (shorter route with granite staircases) or the John Muir Trail (less strenuous option with higher vantage points).
Is Yosemite National Park entry included?
The tour includes a Yosemite National Park Entry Reservation if implemented, but the Yosemite National Park gate fee is not included and must be paid at the time of entry.
What should I bring for food and water?
Food and drinks are not included, so you should bring your own lunch, snacks, and water bottles.
Is the hike suitable for everyone?
It’s described as moderately strenuous, and travelers should have a moderate physical fitness level. Good hiking shoes are required.
Are trekking poles provided?
Trekking poles are not automatically included, but you can request them.