REVIEW · MANILA
Day hike to Mount Daraitan with Tinipak River 2024
Book on Viator →Operated by Hike Manila · Bookable on Viator
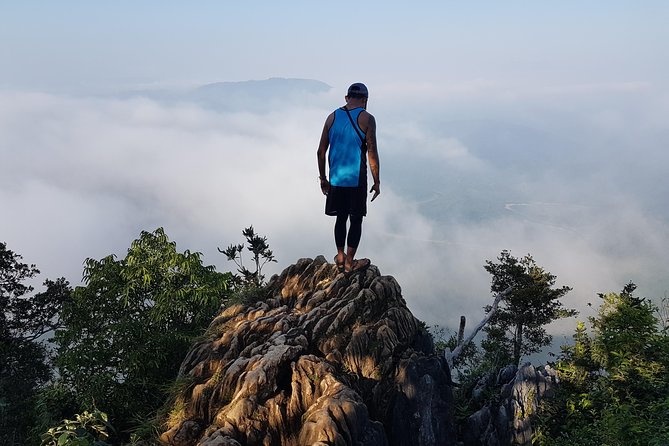
Cloud seas start before sunrise on this hike. Mt. Daraitan rises 739m above Rizal, and you head out from central Manila at 4:00am for summit views and a Tinipak River swim.
I love the small group limit of 15, because it means you get real attention on the steep, rocky bits. I also love that you get door-to-door hotel pickup, so you can focus on the mountain instead of transport chaos early in the morning.
The trade-off: the climb and descent can turn slippery and muddy, particularly if weather rolls in, so plan to move slowly and wear grippy shoes.
In This Review
- Key things that make this hike worth your time
- Mt. Daraitan starts with traffic-free thinking at 4:00am
- Summit views and photo chances along a 739m climb
- The real challenge: slippery, muddy rocks on the descent
- Tinipak River swim: a cool down that isn’t an afterthought
- Stop 1 plan: one main block, about 8 hours of hiking and river time
- Small-group guides: why it feels safer on rocky terrain
- Price and value: what $130 buys (and what it doesn’t)
- What to pack so the descent stays boring
- Who this hike is best for (and who should be cautious)
- Weather and timing: what to expect when conditions change
- Should you book Mt. Daraitan with Tinipak River?
- FAQ
- What time does the hike start?
- How long is the full tour?
- Is lunch included?
- Is hotel pickup included?
- How big is the group?
- What’s the fitness level required?
- What should I bring for the day?
- What happens if the weather is bad?
- Can I get a full refund if I cancel?
Key things that make this hike worth your time
- A capped group of 15 means you’re not stuck behind strangers on a technical, wet trail.
- Hotel pickup across central Manila (plus nearby areas) helps you make the early start without stress.
- Summit views plus a river swim give you two payoff moments instead of just a viewpoint photo.
- Muddy rocks are the real challenge, not the distance, so footwear matters more than your fitness level.
- Local guide coaching (you may get people like Asia, Alexis, Willy, or Joannah) helps you handle the terrain safely and efficiently.
Mt. Daraitan starts with traffic-free thinking at 4:00am
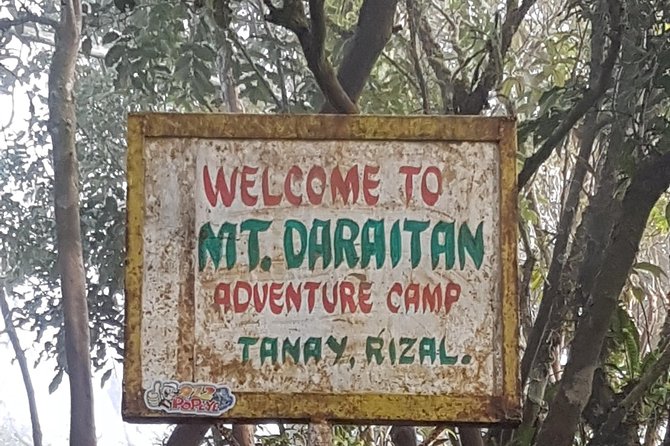
This day hike is built around an early departure for a reason. With a 4:00am start, you’re aiming to be on the mountain while skies are still fresh and calmer. The reward is that classic highland look—layers of cloud and distant peaks—plus the kind of morning light that makes photos pop without trying too hard.
Logistically, that early start is the whole point of the included transfers. The plan includes pickup and drop-off to most central Manila hotels, plus areas like Muntinlupa and Pasay. That matters, because getting stuck in city traffic would cut straight into your hike time and also add fatigue before the first steep section.
You also get a built-in rhythm: early transport, a morning hike, then a cooling swim afterward. You’re not just paying for the “summit moment.” You’re paying for an organized schedule that makes those moments line up.
Summit views and photo chances along a 739m climb
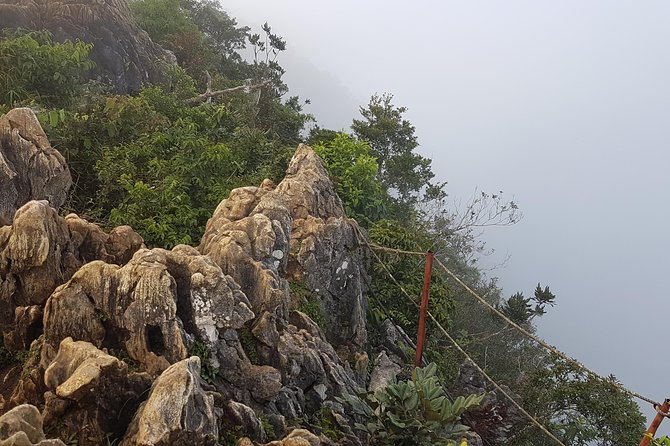
Mt. Daraitan sits at about 739 meters (2,425 feet) above the surrounding Rizal area, and the hike is long enough to feel like effort, but not so long that you’re battling the clock for hours beyond your group’s plan. Your big goal is reaching the top, where you can catch mountain peaks and cloud-like layers that roll through the view.
The photo opportunities are part of the experience design. The hike is described as a chance to capture cloud seas, mountain peaks, and rushing water. In plain terms: you’re heading into terrain where your camera is going to have something to do. Even if you’re not a “photo person,” the scenery is the payoff.
The hike itself is also about movement and footing. More than one guide-led experience like this turns into “clambering” once the ground gets wet, so you’ll want to think of it as a route where you balance and place your feet well—not just walk up a path.
The real challenge: slippery, muddy rocks on the descent
Here’s the most honest part: the distance isn’t usually what scares people. The challenge is slick rocks, mud, and the way the trail behaves when it’s wet. Several people highlight that the ground can be damp for stretches and that rain during the descent can make things feel more intense.
That means your success depends on control. If you try to power through, you’ll lose traction. If you move slowly and deliberately, you’ll likely feel more in command. One strong theme from the guidance: physically, this doesn’t have to be extreme for everyone—what matters is being okay with potential slips, mud underfoot, and the need to slow down.
So think of this as a hike where grip wins. If you’ve only worn sneakers with smooth soles, you’ll feel it. If you’re comfortable with rocky footing, you’ll probably find it manageable even if it’s tough.
Practical takeaway: treat the descent like the hardest part. Your legs may feel fine, but your feet need to stay careful.
Tinipak River swim: a cool down that isn’t an afterthought
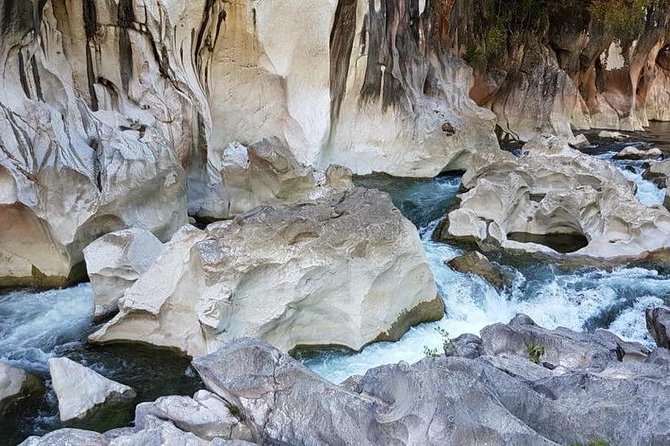
After the climb, you get a refreshing dip in the Tinipak River. That swim isn’t just a cute bonus—it’s what turns a tough, sometimes messy hike into a day that ends with relief.
The river is described as turquoise waters, and the cooling effect is exactly what you want after a morning of effort and a descent that may have you moving carefully over mud and wet stone. It also gives you a change of pace. One minute you’re focusing on footing; the next you’re letting your body relax.
The swim timing matters, too. You’re doing this after the summit segment, so you’ll likely be tired and ready for the reset. Just keep in mind that the “post-hike river” part changes what you should pack (more on that in a bit).
Stop 1 plan: one main block, about 8 hours of hiking and river time
Your day is organized around one main stop. The schedule lists an overall day duration of about 12 hours, and the core hiking/swimming block is about 8 hours, with the admission ticket included.
That one-stop setup is helpful because it reduces uncertainty. You’re not juggling multiple destinations, long drives between attractions, or switching gears every few hours. Instead, you go from transport → climb → summit views → descent → river swim, under one plan.
It also means you need to be ready for a long single focus block. Once you start climbing, you’ll want your energy and water strategy to be steady, not improvised.
Small-group guides: why it feels safer on rocky terrain
This is the kind of hike where a group size becomes more than a comfort issue. With a maximum of 15 travelers, you’re more likely to keep spacing on technical sections. You’re also more likely to get real attention when someone needs a slower pace or a quick adjustment for footing.
The guide team also sounds like a real mix of people with experience and local knowledge. Reviews mention names like Asia as a primary guide, plus local hiking guides such as Alexis and Willy, and other guide pairings like Joannah. Drivers are mentioned too, including Rency and Pedro/Pedz, and that matters for a day starting at 4:00am when comfort and punctuality aren’t optional.
What I like about this style: the experience isn’t just “follow the leader.” It’s about setting a pace that works for the group and giving you instructions for the rocky, slippery segments. That’s exactly what you want when the terrain can be wet or after rain.
Price and value: what $130 buys (and what it doesn’t)
At $130 per person, this hike isn’t “cheap,” but it’s also not priced like an ultra-luxury expedition. To judge value, look at what’s included versus what you still have to handle yourself.
What you get included:
- All fees and taxes
- Admission ticket
- Door-to-door transfers from many central Manila hotels (and nearby areas)
- A small group guided hike capped at 15
- A planned summit + Tinipak River swim experience
What’s not included:
- Lunch
That last point is important. You’ll still need to plan your food, and you’ll probably want lighter snacks during the hike. Reviews specifically encourage bringing things like water and snacks, plus light clothes for the river dip. Since lunch isn’t included, it’s smart to pack or plan accordingly.
Is $130 “worth it”? For me, it comes down to the early start and the transport. If you had to organize the pickup, pay admission separately, and coordinate reliable early transport yourself, the price starts making sense. You’re paying for a day plan that’s designed for the conditions—especially the early timing.
Also, a 15-person cap changes the feel. If you hate being squeezed on narrow, rocky sections, this kind of limit is a real value.
What to pack so the descent stays boring
If you only take one packing lesson from the stories, make it this: shoes and traction matter more than extra gear.
Based on what people call out:
- Bring grippy footwear for slippery rocks. If your shoes are flat or smooth, you’ll struggle.
- Consider packing a water bladder (people specifically recommend it) so you can sip without stopping too often.
- Bring snacks, but keep them light since you’re hiking for most of the day.
- Bring light clothes for the river dip so you don’t spend the rest of the day uncomfortable or cold.
Then add the practical “works in the real world” items you can’t skip:
- A small towel or quick-dry option for after the river
- A dry bag or zip bag for your phone and extra layer
- A plan for wet weather. You’ll already be dealing with slippery ground, and rain can make it more intense on the descent.
If you’re older or you tend to feel cautious on rocky trails, plan to slow your pace early. One account mentions a person doing a lot of sliding due to wrong shoes—so don’t assume your usual footwear is enough.
Who this hike is best for (and who should be cautious)
This is best for you if:
- You can handle a moderate fitness level.
- You’re comfortable with rocky terrain and moving carefully on wet surfaces.
- You want both big scenery (clouds and peaks) and a physical payoff (a river swim).
Be cautious if:
- You have balance issues or a fear of slipping. The terrain can be slippery and muddy.
- You don’t want to slow down. This isn’t a “power hike.” It’s a “place your feet and keep moving” kind of route.
- You’re going without proper traction. If your shoes aren’t up to it, your day might feel stressful.
That said, this doesn’t sound like it’s only for elite athletes. The comments suggest that distance isn’t the main barrier. It’s stamina plus footing discipline, and a guide-led pace helps.
Weather and timing: what to expect when conditions change
This experience runs with the reality that mountain weather is unpredictable. The tour is described as requiring good weather. If it gets canceled due to poor weather, you’ll get either a different date or a full refund.
Even on good days, the trail can be wet, and some accounts describe rain during descent. That’s why the “move slowly” advice is not just theory. Plan your mindset for variable traction.
The early start also means you’re hiking before the day gets too hot. That can be a plus, even if you’re sleepy. Your reward is that the views and the river swim happen before the day feels overlong.
Should you book Mt. Daraitan with Tinipak River?
Book this tour if you want:
- A small group hike with the support of guides (names like Asia, Alexis, Willy, and Joannah come up in recent guide pairings).
- A day that mixes summit views with an actual river swim after you earn it.
- Included transport from central Manila, so you can meet a 4:00am start without headache.
Skip it if:
- You can’t handle muddy, slippery terrain. The stories are consistent that footing is the main challenge.
- You’re expecting an easy, flat walk. This is rocky and technical in places, even if the route is short by hiking standards.
My bottom line: this is a well-designed half-nature, half-adventure day trip that feels worth the money because it handles the hard parts of logistics. Just bring proper footwear, pack for wet conditions, and treat the descent like the main event.
FAQ
What time does the hike start?
The start time is 4:00am, which is why pickup is so important.
How long is the full tour?
The duration is about 12 hours overall, with the main hike and river time listed as about 8 hours.
Is lunch included?
No. Lunch is not included.
Is hotel pickup included?
Yes. Pickup and drop-off are offered to most central Manila hotels, plus Muntinlupa and Pasay.
How big is the group?
The tour has a maximum of 15 travelers.
What’s the fitness level required?
It’s recommended for travelers with moderate physical fitness. The hike may feel more intense because of slippery, muddy rocks.
What should I bring for the day?
Bring water (a water bladder is recommended), light snacks, and light clothes for the dip after the hike.
What happens if the weather is bad?
The experience requires good weather. If it’s canceled due to poor weather, you’ll be offered a different date or a full refund.
Can I get a full refund if I cancel?
Yes. You can cancel up to 24 hours in advance of the experience start time for a full refund.