REVIEW · MOSHI
Best 7 Days Machame Route group hiking on Kilimanjaro
Book on Viator →Operated by Rede Tours and Safaris (Amore African Safari LTD) · Bookable on Viator
The Machame climb mixes mud, glaciers, and grit. Machame route is also called the Whiskey route, and it’s one of the most popular ways up Kilimanjaro for a reason: you get classic southern Kilimanjaro scenery, from the rainforest at the start to high, cold camps and summit views.
I really like the way this plan builds toward altitude: you spend time around Shira Plateau and then continue to Barranco Camp, which helps your body handle the big move later. I also love the specific sights you’ll work toward, like the Western Breach view and the Lava Tower area known as Shark’s Tooth, plus the crater-rim drama near Stella Point.
Here’s the trade-off: Machame can feel steep and demanding, especially because the itinerary is relatively short. And if rain hits the rainforest sections, you’ll be dealing with muddy, slippery trail from early on.
In This Review
- Key highlights I’d circle before you book
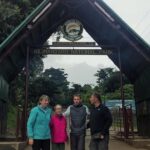
- Moshi pickup and the wet-mud start at Machame Gate
- Rain forest to Shira Plateau: glacier views and a freezing night
- From Shark’s Tooth to Arrow Glacier, then down to Barranco Camp
- Compressing the South Circuit to Barafu Hut
- Midnight summit to Stella Point and Uhuru Peak sunrise
- Down to Mweka Gate: muddy certs and the return to Moshi
- What you’re really paying for in the $2,080 per person price
- Your support team: guides, porters, chef, and tents
- How hard is the Machame route on this 6-day schedule?
- Field-tested packing notes that match this route’s reality
- Should you book this Machame route climb with Rede Tours and Safaris?
- FAQ
- How long is the Machame route climb?
- Where does the hike start and what time does it begin?
- What meals are included during the trek?
- Do you get airport pick-up and transportation?
- What is not included in the price?
- Is the route Machame or something else?
- When do you go for the summit?
- Can I cancel for a full refund?
Key highlights I’d circle before you book
- Rain-forest start to high moorland: the trail shifts fast, so you’ll feel the change in temperature and footing.
- Shira Plateau and glacier sightlines: you’ll look toward big glaciated features as the hike opens up.
- Shark’s Tooth to Barranco Camp: a tough day that still sets you up for better acclimatization.
- South Circuit rhythm to Barafu: summit angles show up from many directions as you push into the final camp.
- Midnight summit push to Stella Point: the climb to the crater rim is the mental and physical test.
- Mweka descent plus summit certificates: you finish with the paperwork moment, then get back to Moshi by vehicle.
Moshi pickup and the wet-mud start at Machame Gate
This trip is based in Moshi, and you’ll start with pickup from Arusha (about 1400m). You’ll drive to Machame Village first, then head toward Machame Gate. Depending on road conditions, you might face a short muddy 3 km walk from the village area, which is exactly the kind of warm-up that also tells you what the terrain will be like.
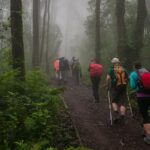
Once you register at the gate office, the climb begins almost immediately through the rainforest. This is one of the biggest practical factors for the whole hike: the weather can turn the trail into soggy, muddy, and slippery terrain. If you’ve never hiked in wet tropical conditions, don’t treat the first day as easy. It’s scenic, yes—but it’s also boots-on-the-ground work.
You’ll stop for a welcome lunch partway and then hike on to the next camp area for the night (the schedule sets you up to start Day 2 from Machame Camp). My best advice for this day: pack for wet. Rain layers and reliable grip matter more than trying to look tough.
You can also read our reviews of more tours and experiences in Moshi.
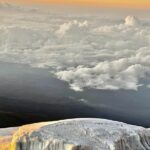
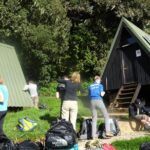
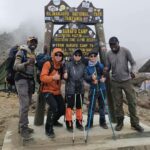
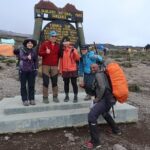
Rain forest to Shira Plateau: glacier views and a freezing night
Day 2 is where Kilimanjaro starts to feel like altitude instead of just hiking. You’ll rise early at Machame Camp, then climb through the upper forest zone for about an hour before transitioning into moorland with a gentler gradient.
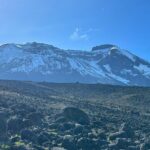
After a short rest and lunch, the route moves onto a rocky ridge toward Shira Plateau. One of the payoff moments comes as the trail opens and you can see toward the Western Breach with its glaciers. It’s not just a pretty view—it helps you understand why this mountain is so steep and so exposed. The terrain gets bigger and the air gets thinner.
You’ll reach Shira campsite at around 3,840m. Nights here can be brutally cold. The plan notes that this exposed camp can be even colder than the previous night, with temperatures dropping well below freezing. You’ll also rely on your support team early: porters boil drinking and washing water before serving dinner, which is practical comfort when you’re dealing with cold hands and thinner air.
From Shark’s Tooth to Arrow Glacier, then down to Barranco Camp
Day 3 starts from Shira Plateau and keeps moving across ridges. You’ll head east up a ridge, passing a junction toward Kibo before the route turns toward the southeast to Lava Tower, often called Shark’s Tooth.
Shortly after, you reach the next junction that brings you up to the Arrow Glacier area (the schedule lists this at 16,000 ft). This is another day that sounds like “just scenery,” but it’s also physically meaningful because you’re working your way through rocky, high-altitude terrain.
Then comes the balance: after the Arrow Glacier section, you descend to Barranco Camp (around 13,000 ft). The note here matters for your body: you end the day at roughly the same elevation you started Day 3, which supports acclimatization. That’s the kind of small “pattern” your body likes—go high, then adjust, instead of constantly increasing without a breather.
Barranco Camp is also a morale checkpoint. You’ve seen major features, you’ve had a demanding day, and you’re not punished with a constantly higher climb overnight.
Compressing the South Circuit to Barafu Hut
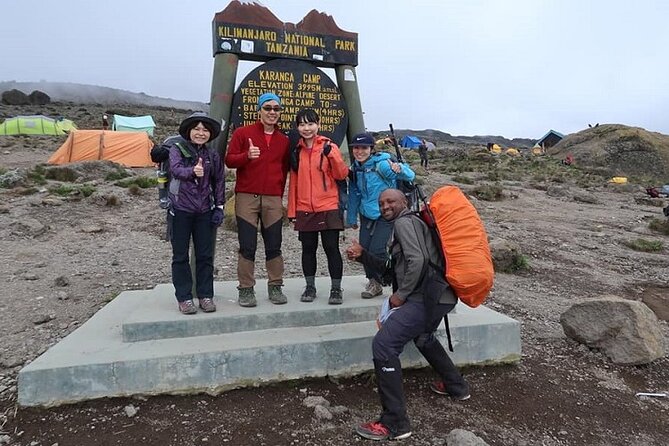
Day 4 moves you out of Barranco and onto steeper terrain. After breakfast, you continue on a steep ridge, passing the Barranco Wall. The schedule includes a stop through Karanga Valley before connecting onward toward Barafu, but it also notes that the 6-day variation combines days four and five and does not stay overnight at Karanga.
So what does that mean in real life? You still get the ridge-to-ridge progression and the route junction experience, but you’ll likely spend less time sleeping at that intermediate camp. Less overnight padding usually means a tougher day, because you’re keeping your body in “climbing mode” for longer.
From Karanga you hit the junction connected with the Mweka Trail, then continue up to Barafu Hut. This is where the South Circuit feeling becomes real. The plan notes that you’ve completed the South Circuit and that you’ll get summit views from many angles. You’ll also be able to see Mawenzi and Kibo from this position.
After you arrive, the focus turns to preparing for the summit push: rest, dinner, and early recovery. My honest take: this is the day you treat sleep and calm seriously. No heroics. You’ll be glad later.
Midnight summit to Stella Point and Uhuru Peak sunrise
This is the defining moment of the Machame experience. Day 5 starts very early, between midnight and 2:00am, and you hike toward the summit between the Rebmann and Ratzel glaciers.
The schedule calls this the most mentally and physically challenging portion of the trek. You ascend through heavy scree toward Stella Point on the crater rim. The altitude listed for Stella Point is 18,600 ft, so this isn’t just “early start hard”—it’s high, steep, and exhausting.
At Stella Point you stop briefly and, weather permitting, you’re rewarded with what the plan describes as the most magnificent sunrise. From Stella Point it’s about a one-hour ascent to Uhuru Peak. Snow may be present on that final stretch.
When you reach Uhuru Peak, you’ve reached the highest point on Mount Kilimanjaro (5,895m) and the highest point in Africa. Even if you’ve trained hard, you’ll feel it. This part is as much about rhythm and breath control as it is about legs.
Practical tip: wear what you can move in when you’re cold. Layers that you can manage quickly are gold when you’re climbing at night and then dealing with sunrise temperature shifts.
Down to Mweka Gate: muddy certs and the return to Moshi
Day 6 is the release valve after the summit test. After breakfast, you descend down to the Mweka Park Gate to receive summit certificates. It’s a straightforward end point, and it’s motivating in a simple way: you know you’ve done the climb when the certificate moment arrives.
At lower elevations, the weather can be wet and muddy. That’s why the plan specifically suggests gaiters and trekking poles. If you’ve never used poles on a rocky descent, this is your chance to learn why people swear by them.
Clothing becomes more relaxed at lower altitudes—shorts and t-shirts might be enough—but don’t ditch all warmth and protection. The plan advises keeping rain gear and warmer clothing handy, because conditions can change even late in the hike.
Once you finish at Mweka gate, a vehicle meets you to drive you back to your hotel in Moshi.
What you’re really paying for in the $2,080 per person price
At $2,080 per person, you’re not just buying a set of trails. You’re buying logistics that matter on Kilimanjaro: all fees and taxes, private transportation, and airport pick-up. The trip also includes meals for the hike window—breakfasts (6), lunches (6), and dinners (5)—which is a big value factor because you can otherwise spend a lot on food planning at altitude.
What isn’t included is important for budgeting:
- Visa
- Tipping the crew
- Flight
- Personal hiking equipment
The value sweet spot here is that your core costs for park access, transfers, and the bulk of daily nutrition are handled. Your remaining costs are mostly your own travel to Tanzania and the gear + crew support extras.
Your support team: guides, porters, chef, and tents
Kilimanjaro is a team sport. In the feedback tied to this operator, you’ll see strong emphasis on the guide, porters, and chef—and that teamwork shows up in small details like boiling drinking and washing water and having dinner ready even after cold nights.
You’ll also see guide names like Nalisis and Omary connected to climbs on this route. I can’t promise any single guide will be assigned to your group, but it does suggest the operator takes guide/crew relationships seriously and invests in competent people.
You’ll also be sleeping in a camp setup that includes tents. Some feedback highlights good tents and hiking services. That’s not a luxury detail—it’s part of how you survive cold, wind, and the “next day” you need to wake up for.
How hard is the Machame route on this 6-day schedule?
This Machame plan is described as difficult and challenging, especially because of the shorter itinerary feel. I’d treat that as a heads-up, not a scare tactic.
Here’s what makes it tough on the ground:
- Steep, climbing-heavy days, especially when weather turns slippery.
- Cold nights, including freezing temperatures at exposed camps like Shira area.
- The summit window, which is early, long, and mentally demanding due to heavy scree near Stella Point.
Who this fits best:
- People who like a faster rhythm and can handle a harder schedule.
- Hikers with some altitude, hiking, or backpacking experience.
- Adventurous travelers who don’t mind that Kilimanjaro is not “relax and take photos” hiking.
Who should think twice:
- If your training is light or you’re prone to fatigue quickly, Machame’s steep feel and shorter padding between camps can feel punishing.
- If you’ve never hiked in cold, windy conditions, spend extra time on layering and foot care planning before you go.
Field-tested packing notes that match this route’s reality
The trip data points to a few gear priorities that are worth respecting:
- Expect rain in the forest and carry rain gear.
- Plan for very cold nights (freezing temperatures are mentioned).
- Use trekking poles and gaiters for the muddy descent.
- Bring layers you can adjust: the lower elevations may feel more comfortable with shorts and t-shirts, but you’ll still want warmth available.
If you’re unsure what “personal equipment” includes, ask the operator early so you don’t arrive scrambling. The route will take enough attention on its own.
Should you book this Machame route climb with Rede Tours and Safaris?
I’d book this if you want the classic Machame experience: rainforest start, Shira Plateau scenery, glacier views, a tough but logical acclimatization pattern, and a summit push to Uhuru Peak with an operator that’s praised for its crew and organization.
I would not book it if you need a gentler pace or a “beginner-friendly” schedule. Machame’s steep, shorter feel is real, and the summit night is not a casual hike.
If you match the profile—fit enough, comfortable with cold, and ready for a serious adventure—this is a strong value at $2,080 because it covers the big logistics (fees, transport, airport pick-up, and most meals) and focuses your energy on the climb.
FAQ
How long is the Machame route climb?
The experience is listed as approximately 6 days.
Where does the hike start and what time does it begin?
It starts at Shanty Town, Tanzania, with a start time of 8:00 am.
What meals are included during the trek?
The included meals are breakfast (6), lunch (6), and dinner (5).
Do you get airport pick-up and transportation?
Yes. Private transportation and airport pick-up are included.
What is not included in the price?
Not included are visa, tipping the crew, flight, and personal hiking equipment.
Is the route Machame or something else?
It’s a 6–7 day Machame route climb on Kilimanjaro, also known as the Whiskey route.
When do you go for the summit?
The summit attempt happens on Day 5, starting very early between midnight and 2:00am, with Uhuru Peak reached on that same day.
Can I cancel for a full refund?
Yes. Free cancellation is available if you cancel at least 24 hours before the experience’s start time.