REVIEW · LOMBOK
3D/2N Rinjani trekking summit,lake and hot springs.
Book on Viator →Operated by lombok trekking info · Bookable on Viator
Cold start, big views, then hot springs.
This Rinjani 3D/2N package is popular for a reason: it targets the big hitters in a tight schedule—Sembalun, the crater rim sunsets, the summit sunrise, Segara Anak, and the hot springs—without feeling like you’re stuck doing “just walking.” The route also moves through open grasslands up to the camps, with rim viewpoints that let you look straight into the crater bowl.
What I like most is how the plan spaces the hike with short breaks and clear checkpoints, so you’re not constantly racing your body. I also like the payoff: the crater and lake views from the rims, plus the chance for an eye-opening sightline from Senaru’s side toward Mount Agung and the Gili Islands. One consideration: you’ll need to budget for the park entrance fee and bring key items like a headlamp yourself, since they’re not included.
In This Review
- Key things to know before you go
- Why this 3D/2N Rinjani route is so popular
- Price and logistics: what $250 buys you (and what you still pay)
- Day 1 from Sembalun to the crater rim: POS stops and sunset potential
- Day 2 at 3 AM: summit timing, then Segara Anak by lunchtime
- Hot springs and Senaru Crater Rim: your earned recovery break
- Day 3 descent to Senaru village: 5–6 hours to reset
- Camping setup, tents, and the porter reality check
- What you should pack (since some key items aren’t included)
- Weather, group minimums, and how cancellations work in real life
- Who this trek suits best
- Should you book this Rinjani 3D/2N trek?
- FAQ
- How long is the Mount Rinjani 3D/2N trek?
- Where does the trek start and end?
- What are the main pickup times on Day 1 and Day 2?
- What is included in the trek package?
- What gear is not included and you should bring?
- Is the park entrance fee included?
Key things to know before you go
- 3 AM summit push for sunrise, so a headlamp is not optional
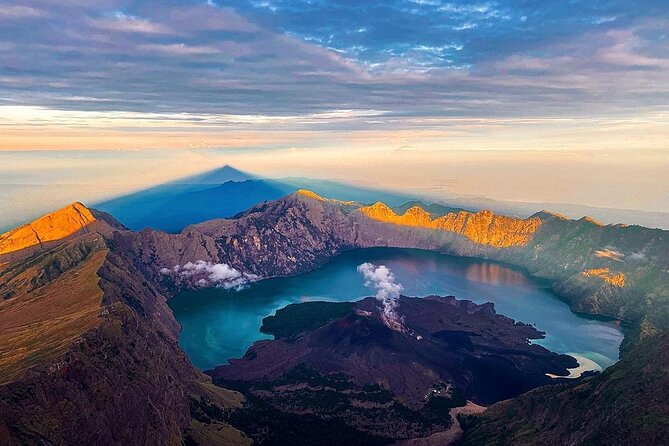
- Segara Anak + lunch by the lake, not just a quick stop
- Hot springs recovery right after the lake day
- Camping gear is provided, including sleeping bags and a toilet tent
- Porters carry trek logistics, but not your personal bag
- Entrance fee extra (IDR 250,000/day/person, listed as IDR 750,000 total)
Why this 3D/2N Rinjani route is so popular
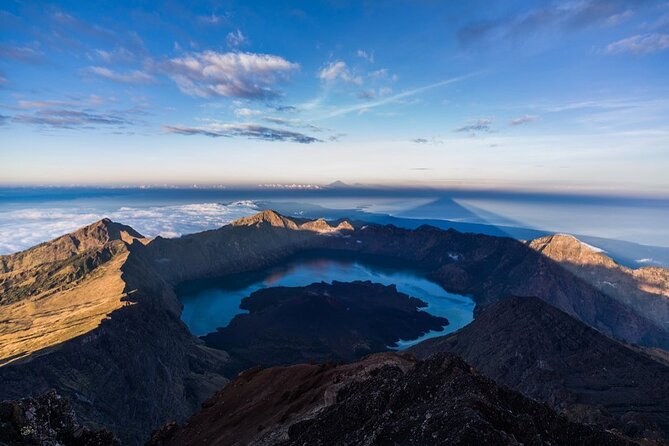
If you want Mount Rinjani in one trip, this itinerary is built for you. Day 1 sets you up with the long climb from the Sembalun side toward the crater rim. Day 2 is the hardest day—early wake-up, summit timing, then a long drop down toward Segara Anak. Day 3 finishes with the descent back to Senaru.
The value here isn’t just the headline sites. It’s the sequence. You don’t see the lake and hot springs “in theory.” You see them as part of a full arc: summit effort, crater rewards, then thermal recovery. I also like that the route includes both crater rim viewpoints—so even if clouds roll in at one spot, you still have other chances for dramatic views.
There’s also a nice rhythm to the trekking day structure. On Day 1, you get short rests at POS points before the final push to the rim. On Day 2, you’re given light breakfast before the summit start, then breakfast again at the rim on the way down. That matters when you’re managing energy and hunger during cold, dark hours.
And yes, views from the Senaru rim can be stunning—people talk about seeing Mount Agung and the Gili Islands from there. Even if you don’t catch the exact same angle, the crater-and-sea perspective is the kind of thing you remember later.
You can also read our reviews of more tours and experiences in Lombok.
Price and logistics: what $250 buys you (and what you still pay)
At $250 per person for a 3-day/2-night trek, you’re mainly paying for the operational side: a Rinjani trekking guide, porters for logistics and equipment, full-board meals, and all camping setup. You’re not paying for everything, though.
Here’s what you should treat as “already covered”:
- Rinjani guide
- Porters (they carry logistics and trek equipment; they don’t carry your personal bag)
- Full board meals during the trek (breakfast, lunch, dinner, plus coffee/tea, snacks, fresh fruit)
- Camping equipment: tents (double size), mattress, sleeping bags, toilet tent, chair and table
- Bottled drinking water each day during the trek program
- Pickup from Senaru or Sembalun (hotel pick-up)
- Your luggage can be stored at the Lombok trekking info office during the trek
And here’s what’s extra or on you:
- Entrance fee: IDR 250,000/day/person, listed as IDR 750,000 per person
- Tipping guide and porters (not included)
- Gear not included: headlamp/hand torch, trekking shoes, trekking poles, gloves, trekking jacket
- Long pants/trousers are not included
- An extra porter for your own luggage is not included
- No pre-trek night accommodation in Senaru
That entrance fee is the big “budget surprise” to avoid. I’d plan your finances as: the package price for the trek services plus the park fee. Also note the Dutch comment style you sometimes see online: some people feel better value booking the official/local way rather than a markup channel. I can’t tell you which path is cheapest for your specific date, but I can tell you this—before you pay, ask exactly who collects the park entrance fee and when.
Day 1 from Sembalun to the crater rim: POS stops and sunset potential
Your Day 1 starts with an ~7 AM hotel pickup in Senaru, then a drive to Sembalun Village (about an hour by mountain car). If you’re staying on the Sembalun side, you’ll also be picked up there.
Then the trek begins. The schedule is paced with planned rests:
- Trek to POS1 in about 2 hours
- Short rest (about 10 minutes)
- Continue to POS2 in about 1 hour
- Short break (about 10 minutes)
- Continue to POS3 in about 1 hour
- Rest for about 2 hours at POS3
- Lunch after POS3
- Continue to Sembalun Crater Rim (about 3 hours)
I like this approach because it avoids the most common mistake on beginner-to-intermediate treks: starting too hard, then gassing out. Here, the early legs are broken up. You’re still working, but you’re not left guessing how hard to push.
There’s also a stop listed as Sindang Gila Waterfall. That usually means a scenic break on the way in or out, not a long nature hike. Either way, it’s a nice contrast to the volcanic terrain and makes the day feel less like one long grind.
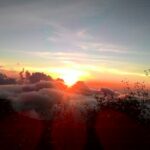
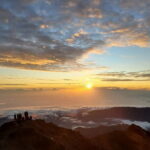
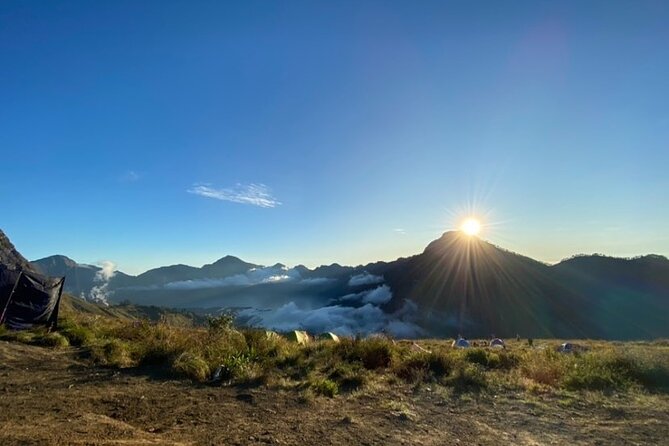
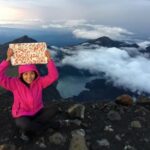
What you’re aiming for at the end of Day 1 is the rim experience. Even before the summit, the crater rim can deliver that wow factor: wide crater views, the geometry of the caldera, and a sense of scale for what you’ll be descending into later.
Practical drawback: Day 1 can still feel long once you add the drive. Plan your previous night’s sleep carefully. If you show up tired, you’ll notice it on those POS climbs and the 2-hour POS3 pause.
Day 2 at 3 AM: summit timing, then Segara Anak by lunchtime
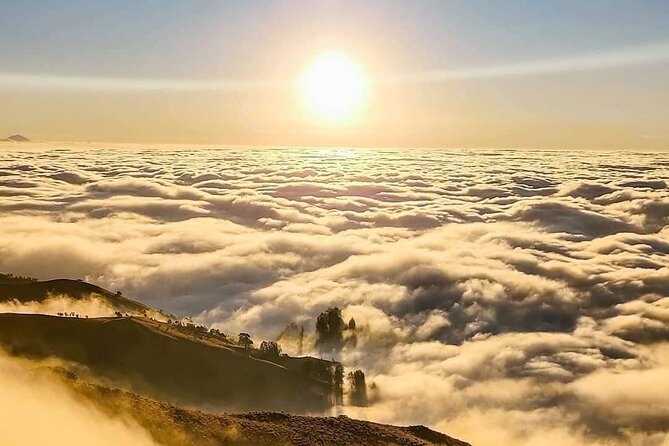
Day 2 is the heavy day, and the timetable makes it clear from the start. You wake at 2:30 AM for a light breakfast, then you head out at 3:00 AM.
The summit segment is listed as about 3.5 hours of trekking. After sunrise viewing, the plan changes gears fast:
- Go down to Sembalun Crater Rim for breakfast
- Then continue toward Segara Anak lake (about 3 hours)
- Lunch is provided beside the lake
- After lunch, the itinerary heads toward the hot springs, then continues to Senaru Crater Rim
What this means for you: you’re not just “going up.” You’re doing the full arc—cold early climbing, then a long crater descent to a real destination, not a look-at-it-and-leave moment. Having breakfast at the rim after sunrise is also smart. Your legs have already done the worst part; food and timing help you keep going.
Also, this is where gear choices matter most. Since headlamp/hand torch is not included, you’ll want to bring your own and test it beforehand. A dark start without a proper light is stressful, and Rinjani doesn’t need extra stress.
Once you reach Segara Anak, the itinerary is set up for comfort where it counts: lunch is provided beside the lake. You get time at the destination (not just a photo stop), so you can actually enjoy the crater setting.
One more practical note: on a day like this, you’ll be happy you packed for conditions. Gloves and a trekking jacket aren’t included, and that gap is important when you’re moving early in the night.
Hot springs and Senaru Crater Rim: your earned recovery break
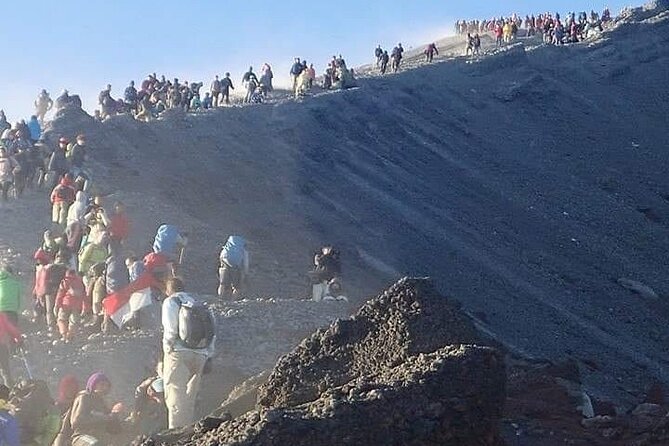
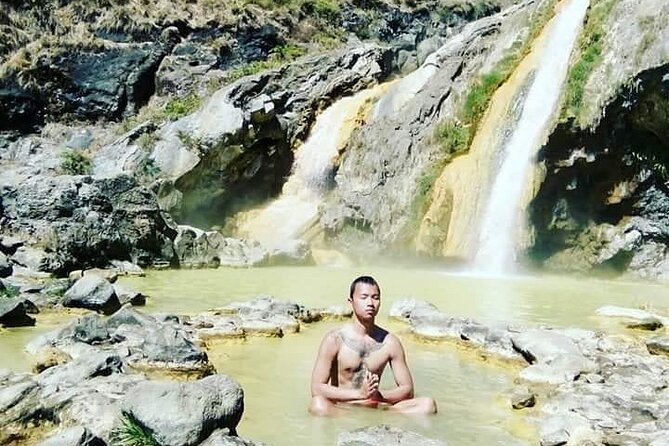
After you enjoy the lake area and lunch, you head to the hot springs. This is one of the most satisfying parts of the whole trip because it breaks the “keep hiking” rhythm.
The plan then continues to Senaru Crater Rim in around 3 hours after the hot springs. In other words, the hot springs aren’t just a side photo op. They’re positioned as recovery after a demanding day.
This is also where the route can feel especially rewarding visually. People talk about the rim views from Senaru’s side, including the chance to spot Mount Agung and the Gili Islands from there. If the weather lines up, that adds a second layer to your crater experience: not only volcanic drama, but also the wider geography beyond the crater rim.
What could be a drawback? Hot springs can be great for tired muscles, but you’re still trekking afterward. So go in to relax, not to soak so long that you lose your legs for the last hike into the rim camp area.
Day 3 descent to Senaru village: 5–6 hours to reset
Day 3 starts with breakfast and some sunrise enjoyment, then the long descent:
- Descend to Senaru village in about 5–6 hours
This day is usually mentally easier because the hardest climbs are behind you, but it can still be tiring. A 5–6 hour descent means you’ll be on your feet longer than you expect, and your knees will feel it if you rush.
I like that the itinerary doesn’t pile on extra detours on Day 3. You already paid your effort dues. Finishing cleanly back into Senaru village is the kind of ending that helps your whole trip feel complete, not chaotic.
Camping setup, tents, and the porter reality check
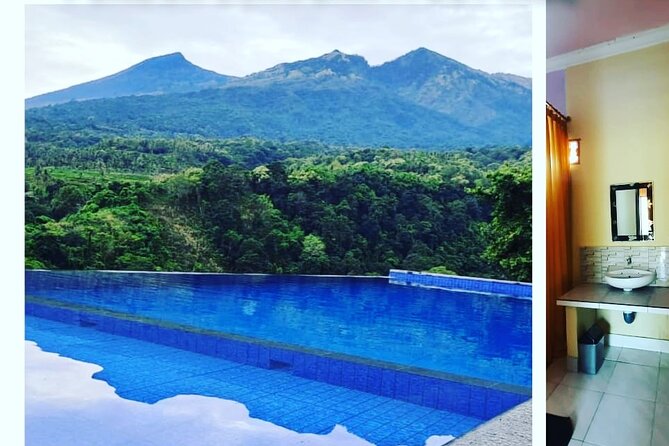
One of the best values in this package is that camping gear is included. You’re not hunting rentals at the last minute.
You get:
- Double size camping tent
- Mattress
- Sleeping bag
- Toilet tent
- Chair and table
This doesn’t magically make mountain camping “hotel comfy,” but it does remove a lot of friction. The difference between arriving with nothing and arriving with a plan is huge here.
Also, you’ll use porters—but not for everything. Porters carry logistic and trek equipment. They do not carry your personal bag. That means you still need to think about what you bring as your daily pack and how you carry it. If you show up with a heavy personal bag, your body pays for that choice.
A small detail with big comfort impact: your luggage can be stored at the Lombok trekking info office during the trek program. That’s useful if you want to travel light but still avoid leaving your main bag unsecured.
What you should pack (since some key items aren’t included)
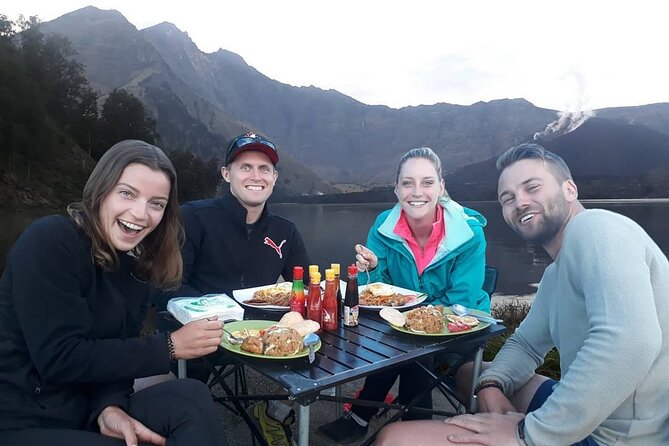
This itinerary lists several trekking items as not included. I’d take that seriously, because Day 2 starts before sunrise and the conditions can be cold.
Bring:
- Headlamp / hand torch (important for the 3:00 AM start)
- Small bag pack / daily pack
- Trekking shoes
- Trekking poles (recommended by many trekkers, but here it’s explicitly not included)
- Gloves
- Trekking jacket
- Long pants / trousers
Also bring what you personally need for comfort and safety—things like blister care, basic first-aid, and any medication you rely on. Those items aren’t mentioned in the package list, so assume you’re responsible for them.
If you want a practical packing goal: plan for warmth early, easy movement for climbing, and traction for the descent.
Weather, group minimums, and how cancellations work in real life
This experience requires good weather. If conditions are bad and it gets canceled due to poor weather, you’ll be offered a different date or a full refund. That’s the right kind of policy for a mountain trek.
There’s also a minimum number of travelers. If the minimum isn’t met, you’ll be offered another date/experience or a full refund.
One more reality check: this is non-refundable and can’t be changed for any reason. So I’d only book once your schedule is truly firm, especially if you’re traveling around multiple islands and flights.
Who this trek suits best
This trek is best for people with strong physical fitness. The requirement is clearly stated, and the schedule backs it up: a summit push after a very short night window, then lake time, hot springs, and another multi-hour move to the rim area.
You’ll also like it if you want:
- A classic Rinjani route with summit + Segara Anak + hot springs
- A guided experience with camp setup handled for you
- Pickup convenience from Senaru or Sembalun
- A private setup where only your group participates
If you’re looking for a relaxed walk with lots of breaks and no early mornings, this one is probably not your match.
Should you book this Rinjani 3D/2N trek?
I think you should book if you’re chasing the full Rinjani highlights—summit sunrise, Segara Anak, and hot springs—and you’re comfortable with a serious early-morning schedule. This itinerary is designed to keep moving while still giving you real meals and camp support, which is where many treks either succeed or fail.
Don’t book yet if:
- You’re missing key gear like a headlamp, trekking shoes, or warm layers and you don’t want to source them last minute
- Your budget can’t handle the park entrance fee on top of the package price
- Your fitness level is more “scenic walk” than “3 AM climbs and long descents”
If you do book, here’s my simple decision checklist:
- Do you have the non-included gear ready before pickup?
- Have you planned for the park fee of IDR 250,000/day/person (listed as IDR 750,000 total)?
- Are you willing to do the hardest day (Day 2) with a 3:00 AM start?
If those boxes are checked, this is a solid, well-structured way to experience Rinjani without cutting corners.
FAQ
How long is the Mount Rinjani 3D/2N trek?
The trek is about 3 days (3 days / 2 nights).
Where does the trek start and end?
It starts in Senaru (Bayan, North Lombok Regency, West Nusa Tenggara) and ends back at the meeting point.
What are the main pickup times on Day 1 and Day 2?
Day 1 pickup in Senaru is at 7 AM, with the drive to Sembalun Village before trekking starts. On Day 2, you wake at 2:30 AM for a light breakfast and leave at 3 AM to start the summit trek.
What is included in the trek package?
Included are a Rinjani trekking guide, porters for logistics and trek equipment (not personal bags), full board meals (breakfast, lunch, dinner, coffee or tea, snacks, fresh fruits), camping equipment (double tents, mattress, sleeping bags, toilet tent, chair and table), bottled drinking water during the trek, and luggage storage at the Lombok trekking info office during the trek. Pickup is included in Senaru or Sembalun.
What gear is not included and you should bring?
Not included are headlamp/hand torch, a small bag/daily pack, trekking shoes, trekking poles, gloves, and a trekking jacket, plus long pants/trousers.
Is the park entrance fee included?
No. The entrance fee is listed as IDR 250,000/day/person, shown as IDR 750,000 per person.